Showing posts with label Desserts. Show all posts

Chocolate Cheesecake

11 January 2011 3 comments


CHOCOLATE CHEESECAKE

If you are looking for an easy to make chocolate cheesecake that tastes great, THIS IS IT. I've tried many recipes and found this to be delicious and not too sweet. I used canned cherries for the topping. You can use any topping that you prefer, be it fruit or chocolate ganache or leave it plain.


ingredients
1-1/2 cups finely crushed graham crackers
1/4 cup finely chopped walnuts
1 tablespoon sugar
1/2 teaspoon ground cinnamon (optional)
1/2 cup butter, melted
2 8-ounce packages cream cheese, softened
1 cup sugar
2 tablespoons all-purpose flour
1 teaspoon vanilla
2 8-ounce cartons dairy sour cream
3 eggs, slightly beaten
4 ounces semisweet chocolate
1 recipe Raspberry Sauce (optional)

directions
1. Preheat oven to 375 degrees F. For crust, in a bowl combine crushed graham crackers, walnuts, the 1 tablespoon sugar, and, if desired, the cinnamon. Stir in melted butter. Press the crumb mixture onto the bottom and about 2 inches up the sides of an 8- or 9-inch springform pan; set aside.
2. For filling, in a large mixing bowl beat cream cheese, the 1 cup sugar, the flour, and vanilla with an electric mixer until combined. Beat in sour cream until smooth. Stir in eggs. Melt 4 ounces semisweet chocolate. Stir the melted chocolate into half of the filling.
3. Pour plain filling into the crust; pour chocolate filling into the crust. Use a narrow metal spatula to gently swirl the fillings. Place the pan in a shallow baking pan. Bake 45 to 50 minutes for 8-inch pan (40 to 45 minutes for 9-inch pan).
4. Cool in pan on a wire rack for 15 minutes. Using a small sharp knife, loosen the crust from sides of pan; cool for 30 minutes. Remove the sides of the pan; cool cheesecake completely on rack. Cover and chill at least 4 hours before serving. If desired, serve with Raspberry Sauce.
5. Makes 12 slices


SUBSCRIBE BY EMAIL HERE

Read full post >>

Sansrival

17 September 2010 6 comments

Sans Rival SANS RIVAL

What do you get when you mix meringue, buttercream and almonds? Sans Rival, what else? The photo and title says it all, what more can I add to it? Delicious, rich, mouth-watering, diet buster, calorie laden dessert. Ah, one shouldn't think of diets when enjoying this dessert. This is one of those rare times that eating it is worth sacrificing 1 day off your healthy lifestyle. That's why you don't eat Sans Rival every week, you're only allowed to have this dessert uhm once every year? Ok, maybe once every six months.


The name Sans Rival is French, meaning 'without rival'. Nobody knows where this dessert originated but it sure has some European characteristics. It's like Napoleons. It's an Almond torte and consists of layered crispy meringue with almonds and buttercream. There is also another dessert that is similar to this called Sylvannas, the only difference being the Sylvannas is shaped like a huge egg but it tastes the same.

I grew up eating Sans Rival from Goldilocks. This is one of my favorite desserts from that popular Filipino bakery along with Mocha and Ube rolls. When I moved to Northern California 20 years ago, I was ecstatic when I learned that Goldilocks is just a drive away. I got a sticker shock though, a small square of Sansrival costs $25 (back then). No wonder it's expensive, it's a little complicated to make this. There aren't a lot of ingredients but it takes a lot of work to assemble the whole thing. After many years of wanting to try to make this dessert, I finally did it two weeks ago. I was thinking of what dish to bring to a party when I decided to make dessert. It turned out quite good, very good, in fact. Would I make it again? Hmm, yes I will (if somebody pays me to do it LOL). I used almonds instead of cashew nuts just because. If you are a novice baker, then I would suggest you buy it instead of trying to make it. :o) For an expert baker, this is quite easy to make. All you need is a lot of patience and Reynolds Release non-stick aluminum foil. If you don't have this special aluminum foil, use baking paper or parchment paper.


SANS RIVAL
for the wafers:
10 egg whites at room temperature
1/4 tsp cream of tartar
1 cup sugar
2 cups finely chopped almonds
for the filling and frosting:
6 egg yolks
1/2 cup light corn syrup
2 tbsp water
1/4 cup sugar
2 sticks butter at room temperature (1/2 lb)
for the topping:
1/2 cup finely chopped almonds
- Beat egg yolks until it turns light yellow.
- Heat corn syrup, sugar and water over low heat. Cook for 2 minutes after it boils.
- Pour the syrup into the egg yolk slowly while beating on medium speed. Set aside to cool down.Cream softened butter and gradually beat in cooled yolk mixture.Set aside.
- Preheat oven to 325F. Line three cookie sheets or jelly roll pan with parchment paper. Generously grease and flour the parchment paper (very important so the meringue will not stick; if you use the Reynolds Release foil, then you don't have to grease and flour)
- Beat egg whites and of tartar until soft peaks form. Add sugar a tablespoon at a time, beating well after each addition. Beat until stiff.
- Fold in ground almonds.
- Spread evenly on the cookie sheets about 1/4 inch thick. Bake for about 30 minutes or until golden brown.
- Cut the wafer into desired size while still warm. Peel off the paper or foil. If the parchment paper is sticking, cover with damp towel for a minute or so.
- Spread the frosting thinly on top of each meringue and stack another meringue, repeat with the layering . Don't put too much frosting in each layer or you wouldn't have enough to frost the outside of the Sans Rival.
- Sprinkle chopped almonds on the top and sides. Chill in the fridge for a couple of hours.


SUBSCRIBE BY EMAIL HERE

Read full post >>

Chocolate Cake with Cheesecake

06 September 2010 18 comments

Chocolate Cake with CheesecakeCHOCOLATE CAKE AND CHEESECAKE

What could be better than combining chocolate cake with cheesecake? It's getting two desserts in one. It is very easy to make for the novice baker, well, except for someone I know who couldn't get it right even after trying it over and over again. She maybe an exception so you should try it if you or your family is a cheesecake and chocolate cake lover. This recipe is from the Cheesecake Factory's German chocolate cheesecake. It's obvious from the photo that I didn't make the traditional topping. We're not fans of that kind of topping so I use chocolate ganache for this cake. The ganache was still warm when I sliced the cake so it dripped but I think it makes for a good photo. What do you think?

CHOCOLATE CAKE AND CHEESECAKE
Chocolate Cake with Cheesecake
For the Cheesecake:
3 8 oz cream cheese package, room temperature and cut into squares
1/4 cup sour cream
2 eggs
1/2 cup sugar
1 tsp vanilla

Pre-heat oven to 425degrees.

Using an electric mixer, mix cream cheese, sugar, eggs, sour cream and vanilla until well-blended and smooth. Do not over beat. Set aside.

For the Chocolate Cake:
4 oz unsweetened chocolate
1/2 cup butter
2 cups sugar
4 eggs
1 tsp vanilla
1 1/2 cups flour

Microwave chocolate and butter 2 to 3 minutes, or until melted. Cool slightly. Using a fork, mix in sugar, eggs and vanilla. Add the flour and mix until everything is incorporated.


Grease a 9 1/2-inch springform pan. Pour the chocolate cake batter and spread evenly. Using a spoon, put dollops of the cheesecake batter on top of the chocolate batter. Carefully spread it over.

Bake in the oven 15 minutes then reduce the oven temperature to 350 degrees. Continue baking 55 to 60 minutes. Turn off the oven. Keep the oven door slighly ajar and let the cake cool to room temperature inside the oven. I use a wooden spoon to keep the oven door from closing. Refrigerate until chilled.

CHOCOLATE GANACHE
3/4 cup heavy cream
12 oz semi-sweet chocolate chips (1 bag)
1 tbsp salted butter

Heat the heavy cream to a simmer. Take off from the heat and add the chocolate chips. Do not stir and let stand for 5 min. Mix in the butter and stir until blended. Let it cool until thick but can still be spread easily. If it gets too sticky, heat in the microwave for 10 seconds and mix. Repeat until the desired consistency.

Remove the cake from the pan and invert onto a cake plate. Spread the chocolate ganache on the top and sides of the cake. Refrigerate until chocolate ganache is set. Bon Apetit!


SUBSCRIBE BY EMAIL HERE

Read full post >>

Mango Custard Tart

24 August 2010 10 comments

Mango Custard Tart

MANGO CUSTARD TART


Mangoes are my favorite fruit. If you have never tasted Philippine mangoes then you have not tasted the BEST mangoes in the world. There is something special with mangoes grown in the Philippines. It is very sweet, has perfect yellow flesh with no strings whatsoever. I remember when we went to the Philippines in 2003, dh tasted Philippine mangoes for the first time and he was hooked. The mangoes we have here in the US are all grown in Mexico. They have this variety called Champagne which looks similar to the Philippine mango but the similarity ends there. The taste does not even come close to the original.

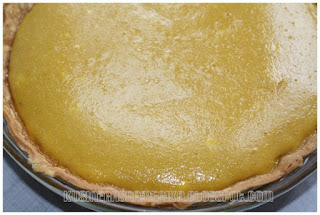
I made this mango custard from Champagne mangoes. The batch that I got was bad and I was very disappointed. Since I already tried making mango ice cream, I decided to try this mango custard recipe from the cruise ship recipe book I purchased when we went on a Mexican Riviera cruise. So what's the verdict? It is very good. If you are into custards and mangoes, then you will like this dessert. I didn't have a tart pan so I used a regular pie plate. I omitted the brandy since I want this to be kid-friendly.
Mango Custart Tart
MANGO CUSTARD TART

1/2 cup sugar
6 tbsp milk
6 tbsp whipping cream
3/4 cup mango puree
2 eggs, lightly beaten
4 egg yolks, lightly beaten
1 1/2 tbsp Napoleon brandy
1 (9-inch) frozen pie shell

1/4 cup whipping cream
1 tbsp powdered sugar

Heat oven to 350F. In a small saucepan, bring sugar, milk and whipping cream to a boil over medium heat. Remove from heat, cool slightly.
Add mango puree, eggs, egg yolks and brandy. Whisk until well mixed and eggs are completely mixed in. Strain mixture into pie shell. Bake 30 to 35 minutes or until custard is set. Cool completely. Refrigerate until serving.

In a small bowl, beat whipping cream and powdered sugar until stiff. Cut pie into slices. Pipe whipped cream rosette on each slice.

*Note: One ripe medium mango should yield about 3/4 cup puree.

SUBSCRIBE BY EMAIL HERE

Mango on Foodista

Read full post >>

Chewy Jumbo Chocolate Chip Cookies

29 March 2009 5 comments

Chewy_Chocolate_Chip_CookiesCHEWY JUMBO CHOCOLATE CHIP COOKIES

I had been searching for the perfect chocolate chip cookie recipe for a long time now. I've had a lot of flops and mediocre cookies, the recipes of which I got from the internet. There was a time when the cookie was as flat as a lace cookie. The dough just melted when it was baking. What a disaster! All I wanted was a chocolate chip cookie that is not dry and one that doesn't crumble into pieces when you bite into it. I wanted a cookie that is chewy and moist. I wasn't planning on using this recipe, I had another recipe I wanted to try. I actually found this recipe by accident. It was printed inside the box of Land O Lakes butter. This recipe yields about 26 jumbo cookies. That's right, it is huge. Of course, you can make it into whatever size you prefer, just adjust the baking time. After tasting this chocolate chip cookie, I knew that my search is over for the perfect recipe.


4 1/2 cups all-purpose flour
1 tsp baking powder
1 tsp baking soda
1 1/2 cups butter, softened (3 sticks)
1 1/4 cups sugar
1 1/4 cups firmly packed brown sugar
2 eggs
1 tbsp vanilla
2 cups semi-sweet chocolate chips (12-oz bag)

- Heat oven to 375F. Combine flour, baking power and baking soda in a bowl and set aside.
- Combine softened butter, sugar and brown sugar in a bowl. Beat at medium speed, scraping bowl often until creamy. Add eggs and vanilla. Continue beating until well mixed. Reduce speed to low. Beat, gradually adding flour mixture until well mixed. Stir in chocolate chips.
- Drop dough by 1/4 cupfuls, 2 inches apart, onto ungreased cookie sheets. Bake for 10 to 14 minutes or until light golden brown. Do not overbake. Let stand 1 to 2 minutes. Remove from cookie sheets.

SUBSCRIBE BY EMAIL HERE

Read full post >>

Sans Rival - Oh My Goodness!

02 March 2009 13 comments

Sans Rival SANS RIVAL

What do you get when you mix meringue, buttercream and almonds? Sans Rival, what else? The photo and title says it all, what more can I add to it? Delicious, rich, mouth-watering, diet buster, calorie laden dessert. Ah, one shouldn't think of diets when enjoying this dessert. This is one of those rare times that eating it is worth sacrificing 1 day off your healthy lifestyle. That's why you don't eat Sans Rival every week, you're only allowed to have this dessert uhm once every year? Ok, maybe once every six months.


The name Sans Rival is French, meaning 'without rival'. Nobody knows where this dessert originated but it sure has some European characteristics. It's like Napoleons. It's an Almond torte and consists of layered crispy meringue with almonds and buttercream. There is also another dessert that is similar to this called Sylvannas, the only difference being the Sylvannas is shaped like a huge egg but it tastes the same.

I grew up eating Sans Rival from Goldilocks. This is one of my favorite desserts from that popular Filipino bakery along with Mocha and Ube rolls. When I moved to Northern California 20 years ago, I was ecstatic when I learned that Goldilocks is just a drive away. I got a sticker shock though, a small square of Sansrival costs $25 (back then). No wonder it's expensive, it's a little complicated to make this. There aren't a lot of ingredients but it takes a lot of work to assemble the whole thing. After many years of wanting to try to make this dessert, I finally did it two weeks ago. I was thinking of what dish to bring to a party when I decided to make dessert. It turned out quite good, very good, in fact. Would I make it again? Hmm, yes I will (if somebody pays me to do it LOL). I used almonds instead of cashew nuts just because. If you are a novice baker, then I would suggest you buy it instead of trying to make it. :o) For an expert baker, this is quite easy to make. All you need is a lot of patience and Reynolds Release non-stick aluminum foil. If you don't have this special aluminum foil, use baking paper or parchment paper.


SANS RIVAL
for the wafers:
10 egg whites at room temperature
1/4 tsp cream of tartar
1 cup sugar
2 cups finely chopped almonds
for the filling and frosting:
6 egg yolks
1/2 cup light corn syrup
2 tbsp water
1/4 cup sugar
2 sticks butter at room temperature (1/2 lb)
for the topping:
1/2 cup finely chopped almonds
- Beat egg yolks until it turns light yellow.
- Heat corn syrup, sugar and water over low heat. Cook for 2 minutes after it boils.
- Pour the syrup into the egg yolk slowly while beating on medium speed. Set aside to cool down.Cream softened butter and gradually beat in cooled yolk mixture.Set aside.
- Preheat oven to 325F. Line three cookie sheets or jelly roll pan with parchment paper. Generously grease and flour the parchment paper (very important so the meringue will not stick; if you use the Reynolds Release foil, then you don't have to grease and flour)
- Beat egg whites and of tartar until soft peaks form. Add sugar a tablespoon at a time, beating well after each addition. Beat until stiff.
- Fold in ground almonds.
- Spread evenly on the cookie sheets about 1/4 inch thick. Bake for about 30 minutes or until golden brown.
- Cut the wafer into desired size while still warm. Peel off the paper or foil. If the parchment paper is sticking, cover with damp towel for a minute or so.
- Spread the frosting thinly on top of each meringue and stack another meringue, repeat with the layering . Don't put too much frosting in each layer or you wouldn't have enough to frost the outside of the Sans Rival.
- Sprinkle chopped almonds on the top and sides. Chill in the fridge for a couple of hours.


SUBSCRIBE BY EMAIL HERE

Read full post >>

Buko Pandan - My Favorite Dessert

24 September 2008 9 comments


I remember tasting this unusual dessert when I went back to the Philippines in 2003. This dessert has young coconut slivers mixed in with Pandan (Screwpine) flavored gelatin, sugar and heavy cream. The cream was heavily colored with Pandan extract so it was greener than the one I made on the photo above. Regardless of the aesthetic, I still liked the taste. It's simple and not pretentious.
Making this is quite easy. The part that took the longest was waiting for the gelatin to set. Otherwise, everything was a breeze. I decided to work on the presentation a little bit. You can blame it on the years I watched Food TV (now the Food Network.)

You can find Pandan (Screwpine) leaves in an Asian grocery, it is usually in the frozen food section. Some grocery have the Pandan extract, using this will save you time. Young coconut is sold in cans or you can also find these in the freezer section.

BUKO PANDAN
2 cans young coconut meat, drained and cut into strings
1/2 teaspoon pandan extract
2 cups heavy cream
3/4 cup sugar or Splenda
for the Pandan gelatin:
2 (90 g) packages unflavored gelatin
3 cups water
1-1 1/2 tablespoon pandan extract
4 drops green food coloring (omit if extract is green)
1/4 cup sugar

Dissolve gelatin and sugar in the water and bring to boil.
Remove from heat and stir in the pandan extract and food color.
Pour into a rectangular pan and refrigerate until firm.
Cut the gelatin into 1 inch cubes.
Whip the heavy cream to thicken it just a little bit but you can use it as it is.

In a large bowl, mix cream, sugar and pandan extract.
Add the gelatin cubes.
Chill before serving.

Notes:
-You can substitue light cream or half and half for the heavy cream. If you want an authentic Filipino flavor, use the brand NESTLE CREAM (canned cream.)
-If using Pandan leaves, boil it in 3 cups of water. Use this liquid for the gelatin.
-Adjust the amount of sugar according to your taste.

SUBSCRIBE BY EMAIL HERE

Read full post >>

Polvoron Just Like Goldilocks

13 April 2008 18 comments

PolvoronWhen we were still living in California, we were spoiled with having a Goldilocks store in the next town. Whenever dh had some craving for polvoron, we'd drive to Union City and stock up on different pastries. Whenever I or any of my relatives go back to Manila for a vacation, we would bring packs of polvoron as 'pasalubong' for dh and the kids.


Polvoron Molds Now that we live in the East Coast, getting Goldilocks polvoron is not that easy. There are some stores in New Jersey and New York that sell these but of course it costs more and I live four hours away.:( Goldilocks also has an online store but then the shipping costs more than the product you are ordering since they only ship 2nd-day Air. So we just ask my cousin who lives near a Goldilocks store in Southern California to buy the polvoron and ship it to us. It is not cheap either. One bag (12 pcs.) costs $15, they sure have a big profit margin on this one. This set-up worked out fine until the last shipment.


Polvoron
It tasted different this time. Dh noticed it too. Gone are the rich and buttery taste. Now it is bland and dry. Because of this, I decided to make my own polvoron. And why not? I remember making this during Home Economics in sixth grade. :) I also have the polvoron molds sitting in a drawer, I asked my mom to get these for 3 years ago. I have not used it since I received it, I guess I'd better start now.


These polvoron tastes just like Goldilocks'. Making it is very easy and definitely costs less $. I used a stand mixer to incorporate the rest of the ingredients into the flour, it is much easier that way. The kids enjoyed helping me make the polvoron. It is very easy for them with the help of the mold. If you would like to wrap these, you can use 'tissue paper' (like the ones you use for gift bags).


Polvoron

1 cup sifted All-purpose flour
1/2 cup full-cream powdered milk (KLIM or Nido)
1/2 cup sugar
1/2 cup soft butter
1/2 tsp vanilla extract

-Toast the flour in a pan over medium heat.

-Stir continuously until light brown.
-Transfer the toasted flour to a mixing bowl.
-Add the rest of the ingredients to the bowl and mix
well.
-Use the polvoron mold to form the mixture.
-Refrigerate for at least 30 minutes.

Variations:

Pinipig Polvoron:
Add 1/4 cup toasted Pinipig

Chocolate Polvoron:
3/4 cup All-purpose flour
1/4 cup sifted cocoa powder
1/2 cup full cream powdered milk
3/4 cup sugar
1/2 cup soft butter

*** I'm expecting a shipment of polvoron molds this summer. Send me an email at kusineraUSA at yahoo dot com to place an order. ***


Subscribe to receive more recipes by email. You will only get emails when there is a new recipe posted. No SPAM or adverts. SUBSCRIBE BY EMAIL HERE

Read full post >>

Dark Chocolate Fudge Brownie Cookies

06 April 2008 10 comments

Dark Chocolate Fudge Brownie Cookies
If you are a brownie and chocolate chip cookie lover, then these cookies are made just for you. :) It is no secret that my kids and dh all have a sweet tooth. After dinner, dessert is always next. Of course, brownies and chocolate chip cookies are just some of their favorites. I found this recipe on the side of the brownie mix box a year ago and decided to try it. They all loved it so instead of making the regular brownies, I make the brownie chocolate chip cookie instead. You can see from the photo that this cookie is fudgy and moist.

I used a dark cookie sheet so I baked it at a lower temperature. It is very important to have a good cookie sheet so your cookie will not spread out too thin. The recipe tells you to grease your cookie sheet. If you are using the non-stick kind, you can omit this step or if you are using a silicone pad like Silpat. If you have the aluminum cookie sheet, I would suggest you use baking paper.

I also added white and chocolate chips. You can also add M&Ms or other chocolate bars that you fancy. Click 'Read More' for the recipe.


Dark Chocolate Fudge Brownie Cookies

1 pkg Duncan Hines Dark Chocolate Fudge Brownie Mix
1 large egg
2 tbsp water
1/3 cup vegetable oil


Preheat oven to 375degF.
Grease cookie sheet.
Combine brownie mix, egg, water and oil in large bowl.
Stir until well blended and soft dough forms.
Drop by level measuring tablespoons about 2 inches apart onto cookie sheet.
Bake at 375degF for 7 to 8 minutes or until cookies are set in center. Do not overbake.

Cool 1 minute before removing to cookie rack.

*You can also make sandwich cookies with these.
Cool cookies completely before assembling.
Use 1 can of ready-made vanilla frosting or any frosting of your choice.
Spread frosting on half the cookies.
Top each frosted cookie with another cookie.
Gently press together.

Subscribe to receive more recipes by email. You will only get emails when there is a new recipe posted. No SPAM or adverts. SUBSCRIBE BY EMAIL HERE

Read full post >>
Chocolate Kahlua Cake Anyone?

04 April 2008 8 comments

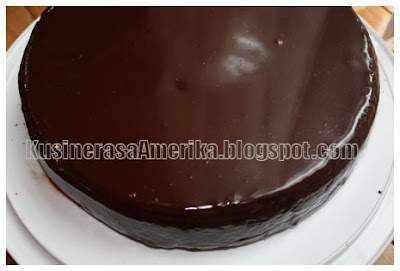
Chocolate Kahlua Cake We went to my in-laws last weekend for a late Easter Egg Hunt. They just arrived from wintering in Florida last Holy Week, hence the late Easter celebration. I always bring Lumpia Shanghai every time dh's family get together. I serve it as an appetizer and they all like our Lumpia (even the teenagers).

This time though, I didn't have time to make it. So on a fly, I decided to try a new recipe I found online. It is very easy, uses a cake mix, instant chocolate pudding, sour cream, chocolate chips and Kahlua creme. I didn't tell dh that there's Kahlua in the cake but he noticed. You can't really tell unless you've tasted Kahlua creme. I saw one recipe that called for one cup of Kahlua, wow, that will be very strong. In this recipe though, it only calls for one-third cup so the Kahlua flavor doesn't overpower the chocolate.

This is the moistest chocolate cake I've made, very chocolatey and of course, delicious. :) The addition of the sour cream makes it moist. You should try it and you'll know what I mean.

CHOCOLATE KAHLUA CAKE

1 pkg. chocolate cake mix
1 (3 3/4 oz.) pkg. vanilla or chocolate instant pudding mix
2 c. sour cream (16 oz)
4 eggs
3/4 c. oil
1/3 c. Kahlua
6 oz. pkg. chocolate chips

Combine cake mix, pudding mix, sour cream, eggs, oil, and Kahlua. Mix until well blended. Stir in chocolate chips. Pour into a well-greased and floured Bundt pan. Bake at 350 degrees for 1 hour.


Enjoy!

SUBSCRIBE BY EMAIL HERE

Read full post >>

Lasang Pinoy 24 - Loco over Coco - Buko Custard Pie

29 February 2008 9 comments

Lasang Pinoy 24

This month's theme for Lasang Pinoy is coconut. There are a lot of recipes using a coconut product. Didn't they say that the coconut is the 'Tree of Life' because every part of the tree can be used in one way or the other.

Living in New England, it is not convenient to get fresh coconut. I miss the wet market in the Philippines where you can buy freshly grated coconut and squeeze it to get the 'kakang gata' or coconut cream or the street vendor pushing a cart full of young coconuts for a refreshing coconut juice drink.Here in the US, you can get a mature coconut from your local grocer but you are on your own when it comes to opening it up. A trip to an Asian grocery will yield a lot of frozen and canned coconut products. These are what I use whenever the recipe calls for one.Coconut products

I had a hard time deciding on what to make since there are a lot of uses for coconut in Philippine cuisine. I only had a week of preparation for this and today is the last day, hooray for Leap Year! LOL

I had the idea of making buko pie but couldn't find a buko pie recipe in the 8(!) Filipino cookbooks I have. While leafing through one cookbook, I came across a recipe for Buko Custard Pie, this is new to me. So, I decided to make this as my contribution for Lasang Pinoy 24.

Buko Custard Pie
BUKO CUSTARD PIE (source: Baking Made EC by Eufemia C. Estrada)

Filling:
1.5 cups shredded buko
0.5 cup sugar
0.75 cup sugar
4 tbsp cornstarch
1 can evaporated milk
3 egg yolks
1 tbsp dayap juice

Meringue Topping:
3 egg whites
6 tbsp sugar

1 pie crust


* Bake the pie crust in a preheated 425degF oven for 15-20 minutes until light brown. Remove from oven and cool on wire rack. Reduce oven temprature to 300degF.

* MAKE THE FILLING: Cook the buko with 1/2 cup sugar until slightly thick. Set aside. Combine 3/4c sugar with the cornstarch and add to the milk. Cook on top of double boiler until slightly thick. Beat egg yolks lightly and add a little of the hot mixture to it then stir into the rest of the hot mixture. Add buko mixture and cook a little longer, until thick, stirring constantly. Set aside and make meringue

*Beat egg whites till frothy, add the sugar gradually and beat to soft peaks.

*ASSEMBLE THE PIE: Pour the hot filling into the cooked pie crust and spread evenly. Top the hot filling with the meringue, taking care to spread the meringue to the sides of the crust to seal it. This will prevent the meringue from weeping.

*Bake in 300degF oven for 15-20 minutes or until lightly golden. Let cool on wire rack.

This buko custard pie turned out very sweet even though I did not add the syrup from the cooked buko. I suggest reducing the amount of sugar (1/4 cup and maybe 1/2 cup) unless you have a sweet tooth. :) Since I do not have Lime to substitute for Dayap, I omitted it. All in all, this is a good take on the buko pie but nothing beats the original of course.
Buko Pie
2 c young coconut, sliced into strips
1/2 c coconut juice
1/2 c condensed milk
2/3 cup evaporated milk
1/2 tsp vanilla extract
1/2 cup cornstarch
1/2 cup evaporated milk
2 ready-made pie crust
Bake one pie crust in 350degF until lightly brown. Set aside.
Combine the filling ingredients except the last two (conrstarch and milk) in a saucepan.
Cook over medium heat, stirring constantly.
Mix the cornstarch and milk.
When the pie filling starts to boil, add the cornstarch mixture, and stir until it has thickened.
Pour into prepared pie crust.
Top with the other pie crust and bake until light brown.
Let the pie cool and refrigerate for a couple of hours until the pie mixture is set.


SUBSCRIBE BY EMAIL HERE

Read full post >>