Chicken, Chorizo and Shrimp Paella

16 December 2008 8 comments

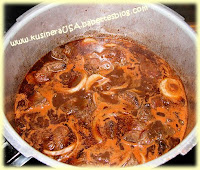
This is one of my favorite dishes. It is simple and easy plus you only need one pan to cook it, less washing for me. :o) The secret to a great Paella is the Saffron. It gives this dish an exquisite flavor in my opinion. Saffron is quite expensive but is essential for a real Paella. I also have a Paella pan to cook it in. If you don't have one, you can use any saute pan that is big enough. You can also cook it in a regular wok and transfer it to a baking dish. I took this photo while the Paella was still cooking so it has some liquid left.

The recipe I used didn't call for shrimps but I added it anyway since I love it and I'm the cook. LOL If you are adding shrimps, do it at the last 5 or so minutes of cooking, depending on the size of your shrimps. If you'll notice in the photo, only one half of the Paella has green peas, that's because my husband hates it while I like it. LOL The recipe also calls for roasted chicken but if you don't have left-over chicken, you can use fresh chicken. I put salt and pepper on fresh chicken and fry it it a little oil.

Here is the recipe I used from Epicurious.


Quick Chicken and Chorizo Paella
Epicurious September 1999

Yield: Makes 4 to 6 servings

1 tablespoon vegetable oil
14 ounces chorizo, cut into 1/2 inch slices on the diagonal
1 small onion, chopped
1 red bell pepper, chopped
2 cloves garlic, chopped
1/4 teaspoon pimenton or paprika
2 cups short- or medium-grain rice
1 pinch saffron threads
2 bay leaves
4 cups chicken stock
1 1/4 pounds roast chicken (meat from 3-pound chicken skinned, deboned, and torn into chunks)
1/2 cup frozen peas
1 tomato, chopped
Coarse salt and freshly ground black pepper to taste

Heat oven to 400°F. Heat oil in a large casserole or paella pan over high heat. Add chorizo and cook until browned and fragrant, about 1 minute. Add onion, red bell pepper, and garlic. Cook, stirring occasionally, until vegetables are tender, about 3 minutes.

Add rice (medium or short grain rice), pimenton, saffron, and bay leaves. Stir to combine and coat the rice, about 1 minute. Add chicken stock and bring to a boil. Add roast chicken, frozen peas, and tomato; stir to combine.

Transfer skillet to oven. Cook uncovered until rice is tender and no liquid remains, about 20 minutes. Remove from the oven. Fluff with a fork and serve immediately.

SUBSCRIBE BY EMAIL HERE

Read full post >>

Brined Roast Turkey

27 November 2008 3 comments


This is Emeril Lagasse's recipe and it is very good. The turkey turned out very moist and still is even when reheated the next day. It is definitely a keeper.

BRINED AND ROASTED TURKEY

1 (10 to 12-pound) turkey
Brine, recipe follows
4 tablespoons unsalted butter at room temperature
1 large yellow onion, cut into 8ths
1 large orange, cut into 8ths
1 stalk celery, cut into 1-inch pieces
1 large carrot, cut into 1-inch pieces
2 bay leaves
2 sprigs thyme
1 1/2 to 2 cups chicken or turkey stock, for basting
Turkey Broth:
1 tablespoon vegetable oil
Reserved turkey neck and giblets
1 large carrot, coarsely chopped
1 onion, coarsely chopped
1 large celery stalk, coarsely chopped
1 small bay leaf
3 cups turkey stock, chicken stock, or canned low-salt chicken broth
3 cups water
Gravy:
4 cups turkey broth
1 cup dry white wine
4 tablespoons unsalted butter
1/4 cup flour
Salt and freshly ground black pepper


Remove the neck, giblets, and liver from the cavity of the turkey and reserve for the gravy. Rinse the turkey inside and out under cold running water.
Soak the turkey in the brine, covered and refrigerated, for at least 4 hours and up to 24 hours.

Preheat the oven to 325 degrees F.

Remove the turkey from the brine and rinse well under cold running water. Pat dry with paper towels, inside and out. Place breast side down in a large, heavy roasting pan, and rub on all sides with the butter. Season lightly inside and out with salt and pepper. Stuff the turkey with the onion, orange, celery, carrot, bay leaves, and thyme. Loosely tie the drumsticks together with kitchen string.

For the turkey broth: Heat the oil in a large heavy saucepan over medium high heat. Add the turkey neck, heart, and gizzard to the pan and saute until just beginning to brown, about 1 minute. Add the chopped vegetables and bay leaf to the pan and saute until soft, about 2 minutes. Pour the stock and 3 cups of water into the pan and bring to a boil. Lower the heat to medium-low and simmer until the stock is reduced to 4 cups, about 1 hour, adding the chopped liver to the pan during the last 15 minutes of cooking.

Strain the stock into a clean pot or large measuring cup. Pull the meat off the neck, chop the neck meat and giblets, and set aside.

Roast the turkey, uncovered, breast side down for 1 hour. Remove from the oven, turn, and baste with 1/2 cup stock. Continue roasting with the breast side up until an instant-read meat thermometer registers 165 degrees F when inserted into the largest section of thigh (avoiding the bone), about 2 3/4 to 3 hours total cooking time. Baste the turkey once every hour with 1/2 to 3/4 cup chicken or turkey stock.

Remove from the oven and place on a platter. Tent with aluminum foil and let rest for 20 minutes before carving.

For the pan gravy: Pour the reserved turkey pan juices into a glass-measuring cup and skim off the fat. Place the roasting pan on 2 stovetop burners over medium heat add the pan juice and 1 cup turkey broth and the white wine to the pan, and deglaze the pan, stirring to scrape any brown bits from the bottom of the pan. Add the remaining 3 cup of broth and bring to a simmer, then transfer to a measuring cup.

In a large heavy saucepan, melt the butter over medium high heat. Stir in the flour and cook, stirring constantly, to make a light roux. Add the hot stock, whisking constantly, then simmer until thickened, about 10 minutes. Add the reserved neck meat and giblets to the pan and adjust seasoning, to taste, with salt and black pepper. Pour into a gravy boat and serve.


Brine:
1 cup salt
1 cup brown sugar
2 oranges, quartered
2 lemons, quartered
6 sprigs thyme
4 sprigs rosemary


To make the brining solution, dissolve the salt and sugar in 2 gallons of cold water in a non-reactive container (such as a clean bucket or large stockpot, or a clean, heavy-duty, plastic garbage bag.) Add the oranges, lemons, thyme, and rosemary.
Note: if you have a big turkey and need more brine than this, use 1/2 cup salt and 1/2 cup brown sugar for every gallon of water.

SUBSCRIBE BY EMAIL HERE

Read full post >>

Osso Buco - My Favorite Italian Dish

08 November 2008 8 comments

KusineraUSA Osso Buco

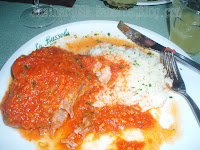
I've seen this dish prepared by TV chefs all the time but have not tried cooking it. While in Italy last summer, I tried Osso Buco for the first time at a restaurant in Florence named La Bussola Ristorante Pizzeria and I was in heaven. You can see in the photo below that it was served with steamed rice and the sauce La Bussola Osso Bucohas A LOT of tomatoes. I love tomatoes so I didn't mind it at all.

If you're not familiar with Osso Buco, it is a regional dish from Piedmont in Italy. It is made with veal shanks although if that is not available, you can substitute beef shanks instead. For the dry white wine, I used Chardonnay since that's what's readily available in my fridge. I also used canned tomatoes.
This recipe is from Epicurious.com and I found it to my liking. It is the classic version of Osso Buco. I omitted the orange zest since I don't remember tasting it in Italy., You can also use the crockpot in cooking this. You only need to brown the shanks and saute the veggies on the stove top first before adding all of the ingredients to the crockpot. This recipe is a keeper. It is as close to the Osso Buco I had in Florence and I will definitely make it again.

CLASSIC OSSO BUCO
4 pounds (1.8 kg) veal shanks, cut in 1 1/2-inch ( 4 cm) slices
1/4 cup (30 g/1 oz) flour
salt and pepper
2 tablespoons olive oil
2 tablespoons butter

2 onions, chopped
1 carrot, chopped
1/2 bottle (375 ml) dry white wine
a 14.5-ounce (435 g) can plum tomatoes, chopped
2 garlic cloves, chopped
grated zest of 2 oranges (I omitted this)
1 cup (250 ml/8 fl oz) veal stock, more if needed

1. Heat the oven to 350°F (176°F/Gas 4). Put the flour on a plate, add generous amounts of salt and pepper, and coat the veal slices, with flour, patting to remove the excess. Heat the oil and butter in a sauté pan or frying pan big enough for all the veal slices to touch the bottom. Add half the slices and brown them over quite high heat, 2 to 3 minutes. Turn them, brown the other side and remove them to a plate. Brown the remaining slices and remove them also.

2. Lower the heat to medium, add the onion and carrot and sauté until golden, 5 to 7 minutes. Pour in the wine and boil until reduced by half, stirring to dissolve the pan juices. Stir in the tomatoes, garlic, orange zest, veal stock, salt, and pepper. Immerse the veal slices in this sauce — the liquid should come at least halfway up the sides. Cover the pan and bring it to a boil.

3. Braise the shanks in the oven until the meat is very tender and falling from the bone, 1 1/2 to 2 hours. Stir from time to time, gently turning the slices, and if the pan seems dry, add more stock. At the end of cooking, taste and adjust seasoning of the sauce. Osso buco can be cooked ahead and stored up to 3 days in the refrigerator, or frozen. Keep it in the pan ready to be reheated on top of the stove.

SUBSCRIBE BY EMAIL HERE

Read full post >>
Itlog Maalat (Salted Eggs)

04 October 2008 13 comments

This is one of those foods that is an acquired taste. As you can tell from its' name, this egg is very salty. I don't even dare to find out how much sodium per serving it contains. That is why I get to enjoy this rarely. Duck eggs are ideal to use when you want to make salted eggs. For me it has a different taste and has more flavor. Uncooked duck eggs are usually available in some Asian supermarkets. You can purchase these already cooked and sold in packs of six. There are also uncooked salted eggs available, boil them as you would boil a regular egg. The ones I've seen is imported from China or Taiwan. The taste is the same as the ones in the Philippines. My relatives always brings me back a tray of salted eggs from Pateros, the city where these salted eggs became well-known for.


If you want to make your own but do not have access to duck eggs, you can use chicken eggs. It is very easy to make. There are two different procedures, one that makes use of mud and one without. I prefer not using mud since I do not want to deal with the mess. If you want the authentic salted eggs with the oily yolk, then you need to prepare it using the method with the mud.
Salted Eggs
10 eggs
1 1/2 cup
salt
6 cups
water

Wash the eggs.
In a large pot, dissolve salt in water.Add the eggs. Put a plate on top of the eggs and put a ziploc bag with enough rice kernels to ensure the eggs remain submerged once the lid is closed.
Leave in room temperature for 30 days.
After 30 days, boil the eggs.
Refrigerate.
These salted eggs with tomatoes and onions are good for use as a side dish when serving fried fish and even dried fish.
Note: The red color is just food coloring. The vendors in the Philippines have different kinds of eggs for sale and the color helps them distinguish the salted eggs from the rest.

SUBSCRIBE BY EMAIL HERE

Read full post >>

Buko Pandan - My Favorite Dessert

24 September 2008 9 comments


I remember tasting this unusual dessert when I went back to the Philippines in 2003. This dessert has young coconut slivers mixed in with Pandan (Screwpine) flavored gelatin, sugar and heavy cream. The cream was heavily colored with Pandan extract so it was greener than the one I made on the photo above. Regardless of the aesthetic, I still liked the taste. It's simple and not pretentious.
Making this is quite easy. The part that took the longest was waiting for the gelatin to set. Otherwise, everything was a breeze. I decided to work on the presentation a little bit. You can blame it on the years I watched Food TV (now the Food Network.)

You can find Pandan (Screwpine) leaves in an Asian grocery, it is usually in the frozen food section. Some grocery have the Pandan extract, using this will save you time. Young coconut is sold in cans or you can also find these in the freezer section.

BUKO PANDAN
2 cans young coconut meat, drained and cut into strings
1/2 teaspoon pandan extract
2 cups heavy cream
3/4 cup sugar or Splenda
for the Pandan gelatin:
2 (90 g) packages unflavored gelatin
3 cups water
1-1 1/2 tablespoon pandan extract
4 drops green food coloring (omit if extract is green)
1/4 cup sugar

Dissolve gelatin and sugar in the water and bring to boil.
Remove from heat and stir in the pandan extract and food color.
Pour into a rectangular pan and refrigerate until firm.
Cut the gelatin into 1 inch cubes.
Whip the heavy cream to thicken it just a little bit but you can use it as it is.

In a large bowl, mix cream, sugar and pandan extract.
Add the gelatin cubes.
Chill before serving.

Notes:
-You can substitue light cream or half and half for the heavy cream. If you want an authentic Filipino flavor, use the brand NESTLE CREAM (canned cream.)
-If using Pandan leaves, boil it in 3 cups of water. Use this liquid for the gelatin.
-Adjust the amount of sugar according to your taste.

SUBSCRIBE BY EMAIL HERE

Read full post >>

Pork Loin with Mushroom Sauce

07 September 2008 6 comments


This is a Roast Pork dish that is usually served by our catering business in Pasig. It's simple to make yet elegant enough to serve in parties.You have to start with a good cut of lean Pork Loin, it has to be large enough so it won't disintegrate when you cut it after it had been tenderized. We don't have a special name for this dish. We call this dish 'pork loin with mushroom sauce'. Big thanks to my mom for teaching me how to make this dish.

Ingredients:
1 large slab of lean Pork Loin
salt and pepper
4 tbsp cooking oil
1/2 can of small tomato paste
5 cups of chicken stock
1 stick of butter
1 small onion, minced
2 tbsp flour
1 cup broth from the cooked pork loin
1 small can of Cream of Mushroom (use regular not low fat)
1 cup grated cheese (any kind)

Wash and dry the pork loin. Season with salt and pepper. Heat cooking oil in a large pot, brown all sides of the pork loin. Add the tomato paste and scrape the browned bits off the bottom of the pan. Add the chicken stock and stir until the tomato paste is dissolved. Cook until the pork loin is tender, stirring the pot once in a while and adding chicken stock if the liquid becomes too low. Set aside 1 cup of the broth to be used in the next step.

Heat the oven to 350 deg F.

In a smaller pot, in medium heat, add butter. When butter is melted, saute the onions until it's cooked but not browned. Add the flour and cook for a minute or two. Then add the broth (that was set aside from the pork loin) a little at a time to prevent lumps. Wait for it to boil. When it's boiling, add the Cream of Mushroom and stir thoroughly.

Take the roast pork loin and cut it into 1/4 inch slices. Set aside. In a pyrex dish, pour 1 cup of the sauce on the bottom. Arrange the roast pork loin slices in the pyrex dish. Pour more sauce on top of the pork loin. Sprinkle the grated cheese on top of the pork loin. Bake in the oven for about 10-15 minutes, just enough for the pork to be reheated through and the cheese to melt. Serve with rice.
SUBSCRIBE BY EMAIL HERE

Read full post >>

Filipino Pork Barbeque

17 August 2008 16 comments

Having pork barbeque signifies the start of the warm weather for me. I live in the part of of the country where there are four seasons and grilling in the middle of winter is not an option (although I tried it once, crazy me!) There are hundreds of recipe variation of pork barbeque. One can basically make their own recipe and call it the same name. This is similar to Teriyaki or Korean barbeque but what sets Filipino pork barbeque from the rest I think is the sweetness from the banana ketchup (you read that right, a ketchup made from bananas.) A typical Filipino pork barbeque has some fat on it. Since dh does not like fat, I make a couple of pieces for him that is all lean meat. It's also important to grill this on medium heat so it will not end up all burnt and crisp. If using a tough part of the pork, you can add some type of lemon soda to the marinade to act as a tenderizer. I prefer to marinate the meat for half a day or a minimum of two hours.

FILIPINO PORK BARBEQUE

2 lbs. pork shoulder, sliced into strips (approx. 1-in wide and 1/2-in thick)
6 cloves garlic, crushed
2 cups light soy sauce
1/4 cup brown sugar
1/2 tsp pepper flakes (can be adjusted to your taste)
juice of 1 lemon
2 tsp Worcestershire sauce
1/2 cup banana ketchup (regular ketchup can be used)
barbeque stick

Marinate the pork in the mixture for a couple of hours. Soak the barbeque stick in water for 5 minutes, this will prevent it from burning. Drain the pork and set aside the marinade. Put the meat in the stick, 2-3 strips per stick.
Cook it in the grill over medium heat, using the marinade as a basting sauce. At the last 5 minutes of cooking, do not baste the pork, just let it finish cooking. Do not overcook, the meat will be tough.

Note:
- this marinade can also be used for chicken
- Banana Ketchup can be purchased in any Asian store that carries Philippine products. (Brands: UFC or Jufran)

SUBSCRIBE TO RECEIVE MORE RECIPES BY EMAIL. YOU WILL ONLY GET EMAILS WHEN THERE IS A NEW RECIPE POSTED. NO SPAM OR ADVERTS. SUBSCRIBE BY EMAIL HERE

Read full post >>

Beef with Broccoli

10 August 2008 8 comments

Someone emailed me and asked me for a quick recipe that can be made with vegetables and meat. This is my 'fall back' dish whenever I'm in a rush or just too lazy to think of what to cook for dinner. This very basic dish can be made with any available ingredients in your fridge. For this recipe, I used beef tri-tips and broccoli. I blanched the broccoli in boiling water for one minute to keep the bright green color. You can adjust the amount of oyster sauce depending on your taste and the kind of chicken stock you use (canned stock are already salty.)

2 long strips of beef tri-tip, sliced thinly about 2-in. long
2 bunches of broccoli, cut into pieces and blanched for 1-min. in boiling water
1/4 onion, sliced thinly
1 garlic clove, minced
2 tbsp Oyster sauce (Lee Kum Kee brand, for example)
2 tsp Chinese rice wine (or sweet rice wine like Mirin)
1 tsp sugar
1 tbsp cornstarch
1/3 cup chicken broth
1 tsp sesame oil
pinch of chili pepper flakes (optional)
1 tbsp canola oil

Mix oyster sauce, rice wine, sugar, cornstarch, chicken broth, sesame oil and ground pepper, set aside. Heat oil in a large pan or skillet. Saute garlic and onions over medium heat until limp. Add beef strips and chili pepper flakes, cook until no longer pink (this cooks quickly since it is sliced thin). Add broccoli pieces, and cook until broccoli stalk is tender but still crunchy, about 4 minutes or less. Add the sauce mixture, stir and mix until it thickens, about 1-1/2 minutes. Serve with steamed rice.

Tip: I purchase the family-size beef tri-tips pack and use the FoodSaver vacuum system to re-pack it in small portions, each pack is just enough for one dish.
SUBSCRIBE BY EMAIL HERE

Read full post >>

Don't Steam It, Lobster Cantonese It!

05 August 2008 7 comments

One advantage of living in New England is the seafood. Since we are on the coast, the price of seafood here is comparatively cheaper than let's say Nebraska. Every summer, dh and I always look forward to having lobster. Lobster can be bought all year round of course, but it is expensive. During the summer months, you can get lobster for $5.99/pound if it is on sale. The most popular way to cook lobster is to steam it (don't boil it!) and another popular restaurant dish is stuffed lobster. I use the steam method if I feel lazy and don't want to spend too much time prepping. But if I'm in the mood to cook (just like the other day), I cook lobster the Cantonese way.

This recipe is from Eileen Lo's Chinese Kitchen. The original recipe calls for fresh live lobsters to be chopped up. I tried this the first time but found it disconcerting. First, I felt guilty cutting up something that is still 'alive' and second, it grossed me out. So the next time that I cooked this dish, I steamed the lobsters for about 4 minutes so it's partially-cooked. You can also use shrimps in lieu of lobsters. Read more for the recipe.


I omitted the part which calls for ground pork and eggs. It's just personal
preference, I think this dish is best with just the lobster and the sauce. If you like sauce on your rice, then double the marinade. Yummy!


LOBSTER CANTONESE
by Eileen Lo
The Chinese Kitchen

Marinade:

1 3/4 tsp soy sauce
1 1/2 tbsp oyster sauce
3/4 tsp salt (I omit this since it's already salty for me)
1 1/2 tsp sugar
pinch ground pepper
2 tsp sesame oil
Lobsters, chopped into pieces
1/4 lb lean ground pork
1/4 tsp salt
1/4 tsp sugar
1/8 cup peanut oil
2 tsp minced garlic
3 large eggs, beaten
2 tsp fresh ginger, minced

2 tbsp Chinese white rice wine
2 scallions, trimmed and finely sliced
1. In a large bowl, combine the marinade ingredients. Place the lobster in the marinade and allow to rest 30 minutes. After 30 minutes, remove the lobster from the marinade and reserve both separately. As the lobster marinates, mix the ground pork with the salt and sugar thoroughly; reserve.

2. Heat oil over high heat and add 1 tsp of minced garlic. When it browns, add pork mixture. Stir to separate and cook for 3 min. When the pork changes color, add the eggs and mix into a soft scramble. Turn off heat, remove all the ingredients and reserve.

3. Using a clean pan, heat oil and add minced ginger. Add the remaining garlic and stir until brown. Add lobster pieces. Spread in a thin layer. Turn the lobster pieces. Add the wine at the edge of the pan and mix thoroughly. When the lobster meat reddens, add the pork-egg mixture and mix all ingredients thoroughly. Add the reserved marinade and stir. Add the scallions and mix well. Turn off heat, transfer to a heated platter, garnish with cucumber and serve with steamed rice.

SUBSCRIBE BY EMAIL HERE

Read full post >>

What's Your Favorite Shrimp Recipe?

31 July 2008 0 comments

I love shellfish, shrimps and lobsters in particular. We usually have lobsters during the summer months, when it is plentiful therefore at their cheapest. Shrimps, meanwhile are available all year round. One of the dish I like to cook during the summer months is sauteed shrimp with corn. It is a super quick dish, no cooking skills required. Fresh corn is best for this recipe and some green vegetable like Spinach or Bokchoy. In the Philippines, my mom use Malunggay for the greens. If you're lucky enough to live in Florida or California, then use this for that unique taste.

I am always on the look-out for simple shellfish dishes like this. I know that there are a lot of recipes on the net but you're not really sure if it's good or not. What's your favorite seafood recipe? If it's unique and inventive, maybe you would want to enter it in the Great American Seafood Cook off . It's great that they hold this contests for seafood lovers, it gives amateur cooks a chance to show off their skill and win great prices. This will also help showcase all seafood that are available locally which would in turn help our economy. I'm lucky enough to live near the largest fishing port in the nation so I know that the seafood I get from the local fish monger is fresh and local.
Read more for the recipe.


Shrimps with Corn

10 pcs shrimp, shelled and deveined
1 1/2 cup corn kernels (2 ears of corn)
1 tbsp canola oil
1 small tomato, chopped
1/3 small onion, chopped
2 cloves garlic, chopped
salt or fish sauce, to taste
ground pepper
1 cup spinach or any green, leafy vegetable
2 cups chicken stock
2 tsp cornstarch, dissolved in 1 tbsp chicken stock

Saute garlic, onion and tomatoes in oil until tender. Add shrimps and cook until pink, set aside the shrimps. Mix in the corn kernels, chicken stock, fish sauce and ground pepper. Bring to boil and cook about 5 minutes, just until the corn kernels are tender. Bring back the shrimps to the pan, add the spinach and the dissolved corn starch. Cook until the sauce thickens (less than 2 minutes). Serve with steamed rice.


Read full post >>

Real Belgian Waffles...Finally!

22 July 2008 7 comments


All these years of making Belgian waffles from scratch went down the drain. I thought that what I was making was a recipe for Belgian waffles. Boy, was I wrong! As you may know, we spent a month touring in Europe. One of the countries we visited was Belgium and what else do you have to try when you're in Belgium? Belgian waffles of course! We did not go to a restaurant for this or waited for breakfast to try it, why? Belgian waffles are eaten as a snack in Belgium and are available everywhere. Yes, even in a small snack stand in the beautiful Antwerp Hauptbanhof (train station).


I still remember my first bite of this Belgian waffle. It is crispy and the chocolate sauce and fresh whipped cream just melded with the warm waffle. Gosh, was I in heaven! From that moment on, I vowed that I will find the 'authentic Belgian waffle' recipe. My Dutch friends told me that this waffle's batter is unlike the ones we make here in the US. It is not a liquid batter but a soft dough which gives the Belgian waffle it's irregular shape as you can see in the photo. The Belgian waffle is also sweet, you can eat it by itself unlike the US counterpart where one needs Maple syrup on it.

The photo on the left is the beautiful train station of Antwerp.
So now, I am on a quest to find the AUTHENTIC BELGIAN WAFFLE recipe. I found a couple on the internet and will try the first one tomorrow. I'm crossing my fingers that it will be just as good or at least close enough to the real Mc Coy.


P.S. Do you also know that the French Fries was invented in Belgium? Oui!

This recipe is for the crispy and light Belgian waffle. This is not for the waffle pictured above. I'm still on a quest for the perfect recipe.

Brussels Waffle

10 tablespoons butter
½ teaspoon salt
1 tablespoon salad oil
1 tablespoon vanilla flavoring
2 cups milk
2 cups water
1 ounce fresh yeast or
1½ envelopes granulated yeast
4 cups sifted flour
4 eggs, separated
½ cup sugar

Heat ½ cup of the water to lukewarm. Dissolve the yeast in the water. Put the flour into a large bowl. Stir in the egg yolks, the sugar, and the yeast. Beat in the remaining water, the milk, the butter, salt, salad oil, and vanilla. Beat until the mixture is smooth. Beat the egg whites until they stand in stiff peaks. Fold them into the batter. Let the batter stand for 1 hour, stirring it 4 times. Bake the waffles in a waffle iron as usual. Serve with whipped cream, fruit, jam or sugar.

Read full post >>

My Kusina Will Be On Vacation...

06 June 2008 9 comments


Read full post >>

Wokna What? It's Woknatoy!

29 May 2008 7 comments

Woknatoy

This is a dish I learned from my mom and as you can see, it has a funny if not weird name. 'Woknatoy', what does it mean? Beats me, I don't know either. This dish was a concoction of a cousin who is in the catering business. It has a tomato-based sauce just like the Menudo or Afritada. The main difference is the addition of sweet pickles and it's juices.
WOKNATOY

1 whole chicken, cut up into pieces
3 cloves garlic, chopped
1 small onion, quartered
1 small can Tomato sauce
1 cup water
1 medium carrot, cut into bite sized pieces
1/2 Red Bell Pepper
1/2 Green Bell Pepper
4 potatoes, quartered
6 pieces Sweet pickle, quartered
1/8 cup pickle juice
Fish Sauce or Salt
Pepper

Saute garlic and onions in oil until limp. Add chicken and some salt, saute until juices comes out. Add the tomato sauce and water. Bring to boil and let simmer for 15 minutes. Add the potatoes and carrots, cook until fork tender. Add the rest of the ingredients. Let simmer for another 5 minutes. Season with fish sauce or salt and pepper.

SUBSCRIBE BY EMAIL HERE

Read full post >>

KeyIngredient.com - More Than a Place for Your Recipes

21 May 2008 4 comments


There are many recipe websites today, but there is one website that offers you more that just a place to store or share your recipes. KeyIngredient.com is a website for people who like to cook. Think of MySpace for cooks. You can build a group with other cooks that share the same interests or style of cooking. Like any other recipe websites, you also get to store your recipes online PLUS more. The main difference is that you have control over who can see your recipes. You can share it with everyone or just your friends or even have it private just for yourself. My favorite feature of this website is the blog widget where you can embed your recipe card in your blog just like the one I have on here. What's more is that you can publish your own recipe collection using Keyingredient.com's online publishing tool. Just choose your recipes, the front page cover photo and voila, you've got your own cookbook. Start sharing your Simple Recipes and be part of this wonderful community. www.keyingredient.com

Read full post >>

Bagoong - An Acquired Taste

18 May 2008 13 comments

Mango with Bagoong

What is the perfect pair for bagoong? Green mangoes of course! Too bad for me, I cannot find any here in my local grocery. The mango in the photo is the closest I can get to a green mango. I chose the mango that has a lot of green color left on the skin, hoping that it is still green inside. As you can see, it's already turned yellow but it is not entirely sweet. I can still taste the tanginess and sourness of an unriped mango, hurrah! :) But this post is about Bagoong. There are many kinds of Bagoong and the one I like is made with tiny shrimps. I never did take a liking to the one made with fermented fish which looks and tastes completely different, my mom by the way, prefer this kind. I think it is more commonly used in the Visayas and Mindanao region.

My husband who eats almost everything tried Bagoong but he didn't like it, he said it is too salty for him even with Kare-kare. My brother-in-law on the other hand, likes Bagoong, go figure. The Bagoong I like to use comes from Pampanga, I find it just right for my taste, not too salty. My perfect Bagoong has a lot of garlic, onions and tomatoes. My mom cooks it with tiny pieces of pork but I prefer it plain. There is a dish I like called Binagoongan, it is made with cubed pork (preferably with fat), garlic, onions, vinegar and Bagoong. People also use Bagoong with Kare-kare (Ox tail in peanut stew) as a condiment and in Pinakbet (a mixture of vegetables and Bagoong). If you do know of any other uses of Bagoong, do let me know.


Bagoong

1 bottle uncooked Bagoong
6 cloves minced garlic
1/2 medium onion, minced
2 tomatoes, chopped
3 tbsp vinegar (can be modified depending on your taste)

Saute garlic and onions in oil until onions are translucent. Add the tomatoes and cooked until soft. Add the Bagoong and mix, bring to boil. Add the vinegar but do not mix (very important!). Cook in medium heat for 10 minutes without mixing. After 10 minutes, mix and taste. Add a tablespoon of vinegar if you feel it needs more acidity (cook another 10 minutes if you added more vinegar).

SUBSCRIBE BY EMAIL HERE

Read full post >>

Pancit Palabok or Pancit Luglug - PART 2

14 May 2008 14 comments

Pancit Palabok


This is my shortcut version. I used to make my Palabok sauce from scratch but one time I bought a Palabok sauce mix and tried it but found it too salty for my taste. Thus my shortcut Palabok recipe was made.


Pancit Palabok Sauce recipe #2

*Saute garlic, onions and ground chicken (or minced chicken). When chicken is cooked, add chopped shrimps and saute until pink.


*Use one packet of Pancit Palabok mix (I use Mama Sita or White King brand).

*Follow the directions at the back of the packet. (It says to add water to the mix).

*Add the uncooked sauce to the sauteed chicken and shrimp. Bring to boil and simmer until thick.

*Add 1 can of Cream of Mushroom soup and enough chicken broth or water to
make a nice sauce. Make sure you don't add too much broth or your sauce will be too watery.


*Mix very well until the Cream of Mushroom is incorporated with the Palabok sauce.

*Bring back to boil. Simmer for another 10 minutes stirring frequently (important if you are not using a non-stick pot).

*Season to taste (I found that the Palabok mix tend to be salty so I don't have to add any more seasonings).


*Serve over cooked pancit bihon. Add ground chicharon, tinapa flakes, eggs, green onions and lemon.

Voila, an instant Pancit Palabok sauce that's fast and easy.


PANCIT PALABOK RECIPE #3 (from scratch)

Palabok:
2 cups Shrimp juice (crush shrimp heads in 2 cups water and strain)
1/4 cup atchuete water (2 tbsp atchuete seeds soaked in 1/4 cup water)
6 tbsp flour dissolved in 1/2 cup water
Fish sauce, to taste
Ground Pepper, a pinch

Add shrimp juice and atchuete water in a sauce pan and mix. Add the flour/water mixture and stir constantly. Bring to boil. Season with fish sauce and pepper. Set aside.

Red Sauce:
3 tbsp cooking oil
4 cloves garlic, minced
1 cup cooked pork, cubed
2 pcs tofu, cubed
1/4 cup atchuete water (22 tbsp atchuete seeds soaked in 1/4c water)
1 cup shrimp juice
1/4 cup flat-leaf parsley (Kinchay)
Fish sauce and ground pepper , to taste

Brown garlic in oil, set aside for garnish. Brown pork in hot oil, add tofu and fry for another minute. Add the atchuete water. Pour the shrimp juice and bring to boil. Add the parsley and season with fish sauce and pepper. Set aside.

Garnish:
1/2 cup Tinapa (smoked fish), flaked
1/2 cup Chicharon, ground
2 hard-boiled eggs, chopped
1/2 cup boiled shrimps
1/4 cup green onions
1 lemon, sliced

Boiled Bihon noodles.

Put noodles in a large platter. Cover with Palabok sauce. Top with the pork and tofu mixture (Red sauce). Sprinkle with Tinapa, Chicharon, eggs, shrimp, green onions and fried garlic. Serve with lemon slices and fish sauce.

Source: Let's Cook With Nora by Nora Daza

Click here for another short version of Pancit Palabok recipe.

If you like my recipe, please leave a comment to let me know and subscribe by email for more delicious recipes. Thank you! :)

SUBSCRIBE BY EMAIL HERE

Read full post >>

Mangoes are Here!

08 May 2008 8 comments

Mangoes! This is what I've been having for breakfast. You should have seen my eyes light up when I walked in at KamMan Asian grocery and saw boxes of mangoes right by the entrance. This is the closest that I can get to mangoes that tastes like the ones back in the Philippines. It's close but it's not the real thing of course, nothing beats the taste of Philippine mangoes. These mangoes are grown in Mexico and they call it 'Champagne' mangoes. One box has 20 pieces and I paid $14.00 They probably got the seeds from our mangoes since it's very similar. I will post a mango dessert later. I tried it when we spent New Year's Eve at Dakak Beach Resort in the Philippines years ago.

Do you have a favorite dessert featuring mangoes?

Read full post >>

Beef Caldereta

05 May 2008 10 comments

Caldereta As with most Filipino food, Caldereta originated in Spain. They have the same dish and almost all the ingredients are similar with the exception of Cinnamon stick, which is called for in the Spanish recipe. This dish can be made with beef, goat meat or even chicken. I prefer using beef for my version of Caldereta. Some recipes call for the use of vinegar as a marinade, along with salt, garlic and pepper. This is advisable if you are using a tough part of the beef as vinegar acts as a meat tenderizer.

Browning the beef as the first step of the cooking is very important. Do not use a non-stick pot or pan for this since you want the brown bits that stick to the bottom of the pan. These will add a lot of flavor to your Caldereta (or any kind of beef stew). Instead of tomato sauce, I prefer to use tomato paste (about 2-3 tbsp depending on how much water you add and how much sauce you want at the end) since I find that the resulting sauce has more depth and flavor. It is also important to let it simmer for a long time since this will allow all the flavors to meld and make the sauce thicker (you don't want a sauce that is watery).


The nice thing about Caldereta is you can omit some or most of the ingredients. As long as you have beef and tomato sauce, you'll still end up with a good dish. It's okay if you don't have liver sauce or olives or green peas. I for one do not add green peas, just because dh does not like it. If you like a Caldereta with a kick, add some chili pepper flakes or chili peppers.

This recipe is a combination of recipes from my mom, aunts and cook books. You can tweak this recipe to accomodate your taste


BEEF CALDERETA
Coooking Caldereta
2 lbs beef cubes
1/4 cup soy sauce
1 tbsp garlic, crushed
1/2 tsp ground pepper
1/4 cup cooking oil
1 medium sized onion, chopped
1 can tomato sauce
1 3/4 cups water
2 tsp Worcestershire sauce
additional 2 1/2 cups water Caldereta
3 medium-sized potatoes, quartered

1 large carrot, chopped
1 red Bell pepper, chopped
1 tsp salt
1/4 cup canned liver spread
1/2 cup green peas
1/2 cup whole olives (optional)
Chili pepper flakes (optional)


- Marinate the beef in soy sauce, garlic and pepper for at least 1 hour. Drain and reserve the marinade.
- Heat the oil in a large pot.
- Fry the beef cubes until brown in all sides. Set aside.
- Add the onion and saute until limp. Caldereta
- Pour in the tomato sauce, water, Worcestershire sauce and reserved marinade.
- Bring to boil and then lower the heat to simmer until the beef cubes are tender (approximately 1 1/2 hours). Add more water if needed. You should end up with an oily and thick sauce just like what is shown in the photo at the right. Skim the fat off the sauce.
- Add potatoes and carrot, cook for 10 minutes.
- Add Bell pepper and cook for another 5 minutes.
- Add the rest of the ingredients. Add salt if needed.
-Serve over rice.

Subscribe to receive more recipes by email. You will only get emails when there is a new recipe posted. No SPAM or adverts. SUBSCRIBE BY EMAIL HERE

Read full post >>

Pepper Steak

01 May 2008 7 comments

Pepper Steak over Egg Noodles

There are days where I don't know what to cook for dinner. Have you ever had one of those days? You have a lot of choices that you don't know for the life of you what to make. Those are the times when I get 'bold' and try new things. This recipe was on the bag of the egg noodles and it turned out very tasty. It is so easy to make and does not take a lot of preparation time.


I used beef tri-tips for this recipe and sliced it thinly so the cooking time is shortened. I also reduced the amount of water, beef bouillon and cornstarch since I only need to cook for 2 adults and 2 kids. Any kind of pasta will work for this dish, use whatever you have.
PEPPER STEAK OVER NOODLES
1 lb. boneless beef round or shoulder steak, sliced thinly
1 tbsp cooking oil
1/2 tsp salt
1 medium sized onion, sliced
1 clove garlic, minced
2 beef bouillon cubes
2 cups boiling water
2 tbsp Worcestershire sauce
1 green or red Bell pepper, cut into strips
2 tbsp cornstarch
1/4 cup water
3 fresh tomatoes, sliced
4 1/2 cups wide egg noodles, (6 oz) uncooked
-Cook egg noodles according to package directions; drain well. Set aside.
-Brown meat in oil in large skillet; season with salt.
-Add onion and garlic; cook until onion is tender.
-Add meat and cook 1 minute.
-Dissolve bouillon cube in 2 cups boiling water; add with Worcestershire sauce to the meat. Cook until meat is tender.
-Add Bell peppers and simmer 5 minutes longer.
-Combine cornstarch and 1/4 cup water; gradually stir into meat mixture.
-Cook, stirring constantly, until sauce thickens and begins to boil.
-Add tomatoes; heat through.
-Serve pepper steak over noodles.
4-6 servings.


SUBSCRIBE BY EMAIL HERE

Read full post >>

What's My Steak? Bistek

28 April 2008 15 comments

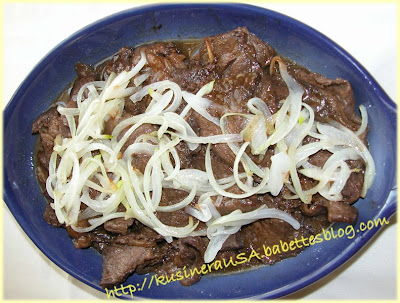
Filipino Beef Steak

You would think that having been living here in the US for 19 years, I would swear off eating Philippine beef steak. Uh-uh, I still crave for Bistek as I call it from my younger days. I like the salty sauce on top of piping hot rice and the crunchiness of the onions with the beef. They say that this is the poor man's steak, I don't know about that since beef round and tenderloin are so expensive.

The type of soy sauce that you use is crucial to this dish. Use soy sauce that is not too salty. I find that Silver Swan brand is too salty for me so I use Marca Pina. I have not tried using Kikoman Lite Soy Sauce for this but I would guess that it will turn out fine since it's not too salty like the original. Using Vidalia onions is also recommended since the sweetness of these type of onions complement the saltiness of the sauce. If you are using a part of the beef other than the round, I suggest you pound the beef slice with a mallet or something similar to tenderize it. I remember my mom using the back of the knife to pound the beef, so it's not cutting through the meat. As with any cooking recipe, this can be tweaked according to your taste.

PHILIPPINE BEEF STEAK "BISTEK"

1 lb. Beef round or tenderloin, sliced thin
1/2 cup soy sauce
Juice of 1 lemon
ground pepper
1 big onion, sliced across so you'll end up with rings

1. Mix soy sauce, ground pepper and lemon juice in a big bowl.
2. Add the sliced beef and mix with your hands. Let sit in the fridge for 30 min.
3. Heat oil in a big pot.
4. Fry the onions up to the consistency you prefer. I prefer my onions to be soft, some like it crunchy. Set aside.
5. Fry the beef but do not over cook. Remember that the beef slices are thin so it does not take long for it to cook. Over cooking the beef will result in tough and dry meat. Set aside the cooked meat while you're cooking the rest of the meat.
6. Pour the sauce in the pot and cook for 2 minutes.
7. Arrange the beef slices in a serving bowl and put the cooked onions on top. Pour the cooked sauce over the meat and onions.
8. Serve over hot rice.

SUBSCRIBE BY EMAIL HERE

Read full post >>

Do We Need To Stock Up On Rice?

23 April 2008 8 comments

Have you heard? There is rice shortage everywhere. Sam's Club, a warehouse club here in the US is limiting the number of rice bags that customers can purchase to four. Apparently, there are a lot of people sending rice back to their relatives in other countries. All food prices have gone up, what's next, a flour shortage?

In the Philippines, there are demonstrations to protest the rice shortage.The government said that the main cause of this is hoarding. A lot of unscrupulous merchants are keeping the rice and waiting until the price is high enough for them to sell. I cannot comprehend why the government will not do something about it. Ok, they say that they trying their best to curtail this problem but I don't think they are doing enough.
Photo Credit:Romeo Ranoco

What do you think is causing this global shortage of rice? One cause could be the popularity of using BioFuel which they said is better for the environment. Governments are giving subsidies to farmers to plant grains that can be used to produce biofuel. So fewer food crops means higher food prices. They are doing this all over the world, including Asia and North America.

I heard on the morning news that here in the US, most farmers are now planting corn instead of rice. Why? The government gives the farmers subsidies to plant corn which can be converted to Ethanol. Ethanol on the other hand is used as an additive to fuel here in the US which makes the US less dependent on oil. It also makes the oil burn more efficiently and cleanly. But what they are not telling us is that making Ethanol cost more energy to produce. It is so convoluted that you need to take notes to remember the pros and cons.

Now the question is, what is more important, feeding the people or keeping the environment clean? It certainly is a double-edged sword. In my opinion, we need to tackle the rice shortage and rising food prices first and then figure out other ways to keep the environment clean.

Read full post >>

Use Your Noodle, Make Pancit Canton

21 April 2008 6 comments

Pancit Canton

Are you a noodle lover like me? I love to eat most noodles and one of my favorites of course is the Filipino Pancit. As with most Asian cuisines, there are different types of noodles in Filipino cuisine. One of them is Pancit Canton. It is not original Filipino 'per se' since it came from the Chinese but with the mixture of cultures these days, one does not care as long as it tastes good.

The perfect Pancit Canton for me has noodles that are 'Al- Dente' and has a lot of sahog (ingredients). I remember having pansit that barely has any sahog, it's all noodles and maybe twenty pieces of cabbage. LOL The cook does not eat veggies so she did not care to add more. Anyway, when I cook any kind of Pancit, I add whatever vegetables I have on hand which is usually Spinach, Carrots, Celery and Onions. If I have Bokchoy or Cabbage, I add that too. Shrimps are a must and either Chicken or Pork. Dh prefers Chinese roast Pork so I add that. I like Chinese Sausage but don't use it because dh does not like the taste. Basically, you can add anything you want. :)


For the noodles, I prefer to use fresh ones. The difference is amazing, when you bite on it, it feels 'springy' or 'elastic. But of course, we do not always have fresh noodles on hand. That's where the dried noodles come in handy. Pancit Canton noodles are the yellow kind, you can also use Chinese egg noodles. I find the Pancit Canton from the Philippines a little salty so I prefer to use the Chinese egg noodles
PANCIT CANTON

3 cloves Garlic,minced
1 medium Onion, chopped 1 cup boiled pork, diced
1 cup shrimp, shelled, deveined and halved
1 medium carrot,julienned
1 stalk Celery, julienned
1 Bokchoy or 1 cup spinach, chopped

Sauce:
2 tsp soy sauce
1 tsp sugar
1 tsp sesame oil
1 tsp Chinese white rice vinegar or distilled vinegar
1 tsp Shao-Hsing wine (Chinese cooking wine)
Pinch of ground white pepper
1 ½ tsp cornstarch
1 cup chicken broth

1. Place the water in a pot and bring to boil over high heat. Add the noodles, stir and cook for 2-4 mins. for fresh noodles and 4-7mins. for dried noodles . depending on the size. Turn off heat and run cold water into the pot and drain.

2. Combine the sauce ingredients and set aside.

3. Heat the oil and add the garlic and stir. When the garlic is golden brown, add the onions and cook for a minute. Add the pork and shrimp. Saute for a minute or until the shrimp turns pink. Add the carrots, celery and Bokchoy stems. When these have softened slightly, add the Spinach and Bokchoy leaves. Make a well in the middle,stir the sauce mixture and pour into the pan. Stir well and cook until the sauce thickens.

4. Add the cooked noodles into the pan and mix until the noodles are coated with the sauce and vegetables are evenly distributed.

5. Serve in a platter with sliced lemons and soy sauce on the side.


SUBSCRIBE BY EMAIL HERE

Read full post >>

What's In My Palayok? Kare-kare

17 April 2008 10 comments

Kare-kare

How I wish I have a palayok in my kitchen. No, I'm not going to use it for cooking since my range is electric. :( I am going to use it for presentation. (Note to self: bring back a palayok from my trip to the Philippines next year). How dramatic can you get if you serve Kare-kare in a palayok? That's how they used to do it in Kamayan and Barrio Fiesta restaurants.

I have some Bokchoy and Chinese green beans in the vegetable crisper and thought of making Kare-kare. I have not cooked it in more than a year so what better time to do it than now. Lucky for me, Ox tails are readily available in our local supermarket. I guess I have to thank the big population of Portugese in the area. :) Make sure you also have Bagoong before you even think of cooking Kare-kare. It is just not complete without it, it is like eating Prime Rib without the Au Jus.

There are two ways to cook Kare-kare: the long way and the easy way. The easy way is using Mama Sita's Kare-kare mix. It's okay, just tweak it to your taste. I for one like the taste of the ground toasted rice. This recipe has been tweaked a little. I got it from the cookbook by Laquian and Sobrevinas.

KARE-KARE ( Meat and Vegetable Stew in Peanut Sauce)

2 1/2 lbs. Oxtail
1 1/2 tsp salt or fish sauce
1 tbsp oil
2 cloves garlic, minced
1/2 medium onion, sliced
1/2 cup atchuete water (1 tbsp atchuete seeds and 1/2 cup water)
2 cups broth (from the oxtail)
3 tbsp peanut butter
2 tbsp ground toasted rice
1/2 lb. Chinese green beans
1/2 lb. Bokchoy
1 med. eggplant, cut into pieces

- Place oxtails in a pot and cover with water. Bring to a boil and simmer until tender.
- Soak atchuete seeds in water for 30 min. Stir and press on the seeds to extract color. Strain and set aside.
- Heat oil in a skillet and saute garlic and onions. Add cooked oxtail and 2 cups broth. Add salt and atchuete water. Simmer for 15 min.
- Take a cup of the broth and stir in peanut butter and toasted rice powder. Add to the pot and bring back to boil and simmer for another 5 min.
- Add green beans and eggplant. Cook another 5 minutes. Add the bokchoy and cook for another 5 min.
- Season with salt or if you prefer, bagoong.


SUBSCRIBE BY EMAIL HERE

Read full post >>

Canvas Photo and Art

0 comments


If you are a mom like me then you have tons of photos of your children. It is time to turn those photos into a canvas photo to display in your home. There is a website online that can help you do this. www.photo-print-on-canvas.com offers different services that will fill any need.

For starters, you can have your favorite photo enlarged and put on a canvas. They can also turn your photo into an artwork. The photo shown here has been changed from a regular photograph into an illustration. The other art effects that they offer are Pop Art, Lichtenstein, Che, Opie and Graphic. Each type is explained with samples of each style. You should check out the photos that were turned into different kinds or art, it is just amazing. If you like Andy Warhol's art, you can have your own photos turned into a similar artwork.

WWW.photo-print-on-canvas.com will retouch your photos for free, there are no hidden charges for this service. You can have the background changed, turn the photo into black and white and change the colors. For artistic edit, they only charge a minimal fee for their services. They offer free FEDEX shipping for any order anywhere in the world. The website is user-friendly and if ever you have a question, you have a choice to chat online with their customer service, send them an email or call their office. They also have a FAQ page where common questions are answered.

This kind of photo canvas will make a great gift for anyone. I know I will get a photo canvas for my in-law's 50th wedding anniversary.

Read full post >>

Escabeche

15 April 2008 10 comments

Escabeche Escabeche I think is the Filipino version of the Chinese Sweet and Sour dish although the latter has a sweeter and thicker sauce (not to mention redder). Escabeche solely refers to a dish made with fish and the accompanying sauce which has a delicate balance of sweet and sour. To get the perfect Escabeche sauce, it has to be just a little sweet with a hint of sourness to perfectly complement the delicate taste of the fish. Anything more than that will ruin the whole dish.

I've tried a lot of recipes and found some to be overly sweet or too sour. The kind of vinegar that is used is very important. If you are using a recipe from a Philippine cookbook, I suggest using cane vinegar like Datu Puti. This kind of vinegar is not as acidic as the regular distilled vinegar.

Using whole fish adds a special touch, the dish looks nice when you serve it. Some Americans are queasy when they see whole fish served on the table, what more if they see a whole lechon? I can just imagine my MIL when she sees a lechon complete with the head. She will probably swear off on eating any kind of pork for life. LOL I'm thankful that dh is not like that. Here in our local grocery, they only sell fillets of fish. So every time we go to the Asian grocery near Boston, I always get a whole fish. This time I got a whole Lane Snapper, just the perfect size for the family.

Escabeche
I used an oval-shaped pan to fry the fish. This was the reason I purchased this pan in the first place (NO, I am not a fan of Rachel Ray LOL). I've used the regular round pan and fishes this size don't fit (unless you have a huge kawali from the Philippines :)).


ESCABECHE (Pickled Fried Fish)

1 medium sized fish, cleaned
2 tsp salt
1/2 lemon
1/3 cup oil
2 cloves garlic, minced
1 small onion, sliced
1/2 green pepper, cut into strips
1 tbsp ginger strips
1 carrot, cut into strips
1/4 cup vinegar
1/2 cup water
1/4 cup sugar
1/2 tsp salt
1 tbsp soy sauce
2 tbsp catsup
1 tsp cornstarch, dissolved in 2 tbsp water

*Rub fish all over with lemon. Sprinkle with salt and let stand for half an hour.
*Fry in oil until brown. Set aside.
*Saute garlic, ginger and onions until onions are translucent. Add carrots and saute for 3 mins. Add the green pepper and saute for another 2 mins.
*Add sugar, salt, soy sauce and catsup to the water and mix until dissolved. Pour into the pan with the vegetables. Add vinegar and bring to boil.
*Stir in cornstarch solution and cook until thick and transparent.
*Pour sauce over the fish and serve with white rice.

Source: Filipino Cooking by E.Laquian and I.Sobrevinas


SUBSCRIBE BY EMAIL HERE

Read full post >>