Tastes Like Honey Baked's Cheesy Potatoes and Ham Casserole

11 January 2011 4 comments


CHEESY POTATOES AND HAM

I first tasted Cheesy Potatoes and Ham at the Honey Baked Ham store last month. We always buy our Christmas ham at this store. I know it is expensive but it is well-worth it in my opinion. Every Christmas season, they give out samples of all the side dishes and desserts and this dish was one of them. I loved it but I don't want to buy it and spend more so I decided to look online for a similar recipe and found this. I followed the recipe the first time and found it a little dry for my preference so I made more gravy the second time I cooked this and it was perfect.

I highly recommend this potato casserole if you are tired of the usual mashed, scalloped or roasted potatoes to accompany your entree.


1/2 medium onion, chopped
1/4 cup butter
1/4 cup flour
1 tsp. salt
1/2 tsp. pepper
1 1/2 cups milk
2 cups shredded cheese
1/2 lb ham, diced
6 cups diced cooked potatoes
1/4 cup fresh parsley, chopped (optional)
Preheat oven to 350.
Begin by chopping the onion and parsley and cubing the potatoes.
Saute the onion in butter until it is tender but not browned. Blend in the flour, salt, and pepper. Cook for a few minutes to get rid of the raw flour taste.
Now gradually add the milk. Cook, stirring constantly until the mixture is thickened. Add 1 1/2 cups of the cheese and stir until melted.
Add the ham, potatoes and parsley. Stir well to combine, being careful not to break up the potatoes too much.
Pour the mixture into a greased baking dish. Top with the remaining cheese. Bake at 350 for 30 minutes.


SUBSCRIBE BY EMAIL HERE

Read full post >>

Chocolate Cheesecake

3 comments


CHOCOLATE CHEESECAKE

If you are looking for an easy to make chocolate cheesecake that tastes great, THIS IS IT. I've tried many recipes and found this to be delicious and not too sweet. I used canned cherries for the topping. You can use any topping that you prefer, be it fruit or chocolate ganache or leave it plain.


ingredients
1-1/2 cups finely crushed graham crackers
1/4 cup finely chopped walnuts
1 tablespoon sugar
1/2 teaspoon ground cinnamon (optional)
1/2 cup butter, melted
2 8-ounce packages cream cheese, softened
1 cup sugar
2 tablespoons all-purpose flour
1 teaspoon vanilla
2 8-ounce cartons dairy sour cream
3 eggs, slightly beaten
4 ounces semisweet chocolate
1 recipe Raspberry Sauce (optional)

directions
1. Preheat oven to 375 degrees F. For crust, in a bowl combine crushed graham crackers, walnuts, the 1 tablespoon sugar, and, if desired, the cinnamon. Stir in melted butter. Press the crumb mixture onto the bottom and about 2 inches up the sides of an 8- or 9-inch springform pan; set aside.
2. For filling, in a large mixing bowl beat cream cheese, the 1 cup sugar, the flour, and vanilla with an electric mixer until combined. Beat in sour cream until smooth. Stir in eggs. Melt 4 ounces semisweet chocolate. Stir the melted chocolate into half of the filling.
3. Pour plain filling into the crust; pour chocolate filling into the crust. Use a narrow metal spatula to gently swirl the fillings. Place the pan in a shallow baking pan. Bake 45 to 50 minutes for 8-inch pan (40 to 45 minutes for 9-inch pan).
4. Cool in pan on a wire rack for 15 minutes. Using a small sharp knife, loosen the crust from sides of pan; cool for 30 minutes. Remove the sides of the pan; cool cheesecake completely on rack. Cover and chill at least 4 hours before serving. If desired, serve with Raspberry Sauce.
5. Makes 12 slices


SUBSCRIBE BY EMAIL HERE

Read full post >>

Pasta Alla Carbonara

07 October 2010 16 comments

Pasta Alla Carbonara PASTA ALLA CARBONARA
There are many versions of Carbonara. Even in Italy, restaurants make this dish different ways. While in Rome, we tasted three different takes on this dish. Italian food purists will tell you that a 'real' Carbonara does not have cream while others prefer to use cream to get the texture they prefer. We ate at a restaurant in Borgo Pio near the Vatican and they served their Carbonara using spaghetti and without the cream plus it was loaded with freshly ground black pepper. The restaurant we went to near Piazza Navona meanwhile used ziti and cream in their Carbonara which my family and I prefer. The traditional style is just too dry and we prefer our Carbonara to be a little creamy. Whatever style you prefer, Carbonara is an easy recipe to follow and prepare. These recipes are from Emeril Lagasse and Gourmet magazine and I tweaked it to suit my family's taste (I omitted the butter, used less oil, doubled the liquid, etc.) If you don't have Pancetta, use bacon; if you like garlic, add it with the onions. As with any recipe, you can tweak it to suit your personal taste.

CREAMY CARBONARA

1 tsp olive oil
1 small yellow onion, chopped finely
3 pcs pancetta or bacon diced
1 pound pasta
3 large egg yolks
1/2 cup heavy cream
1/2 cup 1% milk
1/2 cup grated Parmesan cheese
ground black pepper

All ingredients should be at room temperature for even and fast cooking (eggs, heavy cream, milk and cheese).

Heat oil over medium heat. Add the onion and pancetta and cook until the onions are wilted and the pancetta is brown. Remove from the heat and set aside.

Bring a large pot of salted water to a boil and cook the pasta until al dente. While the pasta is cooking, whisk together the egg yolks and heavy cream in a bowl and set aside.

Drain the pasta and reserve a cup of the water. Return pasta to the pot and over high heat, add the pancetta and onion mixture. Stir until the pasta is coated with the pancetta mixture.

Add to the egg yolk/heavy cream mixture to the pasta, along with the Parmesan. Remove the pot from the heat and toss the pasta until it is well-coated. Season with salt and freshly ground black pepper, to taste. If needed, add a bit of the reserved pasta cooking liquid to help toss the pasta if it is dry. If it's too watery, add more parmesan cheese. Serve immediately.

TRADITIONAL CARBONARA
5 pcs pancetta or bacon
1 medium onion, chopped finely
1/4 cup dry white wine
1 pound pasta
3 large eggs*
3/4 cup grated Parmesan cheese
1/3 cup grated Pecorino Romano
1 tsp fresh ground black pepper
1/4 tsp salt

Slice pancetta into cubes and brown in a pan. Add onions and cook until wilted. Add wine and boil until it's reduced by half. Cook the pasta in salted water until al dente. Meanwhile, mix the eggs, the two cheeses, black pepper, salt in a bowl.
Drain the pasta and add to the onion and wine mixture. Under lowe heat, mix well until all the pasta is coated. Remove the pan from the stove and add the egg mixture. Serve while warm.

SUBSCRIBE BY EMAIL HERE

Read full post >>

Sansrival

17 September 2010 6 comments

Sans Rival SANS RIVAL

What do you get when you mix meringue, buttercream and almonds? Sans Rival, what else? The photo and title says it all, what more can I add to it? Delicious, rich, mouth-watering, diet buster, calorie laden dessert. Ah, one shouldn't think of diets when enjoying this dessert. This is one of those rare times that eating it is worth sacrificing 1 day off your healthy lifestyle. That's why you don't eat Sans Rival every week, you're only allowed to have this dessert uhm once every year? Ok, maybe once every six months.


The name Sans Rival is French, meaning 'without rival'. Nobody knows where this dessert originated but it sure has some European characteristics. It's like Napoleons. It's an Almond torte and consists of layered crispy meringue with almonds and buttercream. There is also another dessert that is similar to this called Sylvannas, the only difference being the Sylvannas is shaped like a huge egg but it tastes the same.

I grew up eating Sans Rival from Goldilocks. This is one of my favorite desserts from that popular Filipino bakery along with Mocha and Ube rolls. When I moved to Northern California 20 years ago, I was ecstatic when I learned that Goldilocks is just a drive away. I got a sticker shock though, a small square of Sansrival costs $25 (back then). No wonder it's expensive, it's a little complicated to make this. There aren't a lot of ingredients but it takes a lot of work to assemble the whole thing. After many years of wanting to try to make this dessert, I finally did it two weeks ago. I was thinking of what dish to bring to a party when I decided to make dessert. It turned out quite good, very good, in fact. Would I make it again? Hmm, yes I will (if somebody pays me to do it LOL). I used almonds instead of cashew nuts just because. If you are a novice baker, then I would suggest you buy it instead of trying to make it. :o) For an expert baker, this is quite easy to make. All you need is a lot of patience and Reynolds Release non-stick aluminum foil. If you don't have this special aluminum foil, use baking paper or parchment paper.


SANS RIVAL
for the wafers:
10 egg whites at room temperature
1/4 tsp cream of tartar
1 cup sugar
2 cups finely chopped almonds
for the filling and frosting:
6 egg yolks
1/2 cup light corn syrup
2 tbsp water
1/4 cup sugar
2 sticks butter at room temperature (1/2 lb)
for the topping:
1/2 cup finely chopped almonds
- Beat egg yolks until it turns light yellow.
- Heat corn syrup, sugar and water over low heat. Cook for 2 minutes after it boils.
- Pour the syrup into the egg yolk slowly while beating on medium speed. Set aside to cool down.Cream softened butter and gradually beat in cooled yolk mixture.Set aside.
- Preheat oven to 325F. Line three cookie sheets or jelly roll pan with parchment paper. Generously grease and flour the parchment paper (very important so the meringue will not stick; if you use the Reynolds Release foil, then you don't have to grease and flour)
- Beat egg whites and of tartar until soft peaks form. Add sugar a tablespoon at a time, beating well after each addition. Beat until stiff.
- Fold in ground almonds.
- Spread evenly on the cookie sheets about 1/4 inch thick. Bake for about 30 minutes or until golden brown.
- Cut the wafer into desired size while still warm. Peel off the paper or foil. If the parchment paper is sticking, cover with damp towel for a minute or so.
- Spread the frosting thinly on top of each meringue and stack another meringue, repeat with the layering . Don't put too much frosting in each layer or you wouldn't have enough to frost the outside of the Sans Rival.
- Sprinkle chopped almonds on the top and sides. Chill in the fridge for a couple of hours.


SUBSCRIBE BY EMAIL HERE

Read full post >>

Chocolate Cake with Cheesecake

06 September 2010 18 comments

Chocolate Cake with CheesecakeCHOCOLATE CAKE AND CHEESECAKE

What could be better than combining chocolate cake with cheesecake? It's getting two desserts in one. It is very easy to make for the novice baker, well, except for someone I know who couldn't get it right even after trying it over and over again. She maybe an exception so you should try it if you or your family is a cheesecake and chocolate cake lover. This recipe is from the Cheesecake Factory's German chocolate cheesecake. It's obvious from the photo that I didn't make the traditional topping. We're not fans of that kind of topping so I use chocolate ganache for this cake. The ganache was still warm when I sliced the cake so it dripped but I think it makes for a good photo. What do you think?

CHOCOLATE CAKE AND CHEESECAKE
Chocolate Cake with Cheesecake
For the Cheesecake:
3 8 oz cream cheese package, room temperature and cut into squares
1/4 cup sour cream
2 eggs
1/2 cup sugar
1 tsp vanilla

Pre-heat oven to 425degrees.

Using an electric mixer, mix cream cheese, sugar, eggs, sour cream and vanilla until well-blended and smooth. Do not over beat. Set aside.

For the Chocolate Cake:
4 oz unsweetened chocolate
1/2 cup butter
2 cups sugar
4 eggs
1 tsp vanilla
1 1/2 cups flour

Microwave chocolate and butter 2 to 3 minutes, or until melted. Cool slightly. Using a fork, mix in sugar, eggs and vanilla. Add the flour and mix until everything is incorporated.


Grease a 9 1/2-inch springform pan. Pour the chocolate cake batter and spread evenly. Using a spoon, put dollops of the cheesecake batter on top of the chocolate batter. Carefully spread it over.

Bake in the oven 15 minutes then reduce the oven temperature to 350 degrees. Continue baking 55 to 60 minutes. Turn off the oven. Keep the oven door slighly ajar and let the cake cool to room temperature inside the oven. I use a wooden spoon to keep the oven door from closing. Refrigerate until chilled.

CHOCOLATE GANACHE
3/4 cup heavy cream
12 oz semi-sweet chocolate chips (1 bag)
1 tbsp salted butter

Heat the heavy cream to a simmer. Take off from the heat and add the chocolate chips. Do not stir and let stand for 5 min. Mix in the butter and stir until blended. Let it cool until thick but can still be spread easily. If it gets too sticky, heat in the microwave for 10 seconds and mix. Repeat until the desired consistency.

Remove the cake from the pan and invert onto a cake plate. Spread the chocolate ganache on the top and sides of the cake. Refrigerate until chocolate ganache is set. Bon Apetit!


SUBSCRIBE BY EMAIL HERE

Read full post >>

Mango Custard Tart

24 August 2010 10 comments

Mango Custard Tart

MANGO CUSTARD TART


Mangoes are my favorite fruit. If you have never tasted Philippine mangoes then you have not tasted the BEST mangoes in the world. There is something special with mangoes grown in the Philippines. It is very sweet, has perfect yellow flesh with no strings whatsoever. I remember when we went to the Philippines in 2003, dh tasted Philippine mangoes for the first time and he was hooked. The mangoes we have here in the US are all grown in Mexico. They have this variety called Champagne which looks similar to the Philippine mango but the similarity ends there. The taste does not even come close to the original.

I made this mango custard from Champagne mangoes. The batch that I got was bad and I was very disappointed. Since I already tried making mango ice cream, I decided to try this mango custard recipe from the cruise ship recipe book I purchased when we went on a Mexican Riviera cruise. So what's the verdict? It is very good. If you are into custards and mangoes, then you will like this dessert. I didn't have a tart pan so I used a regular pie plate. I omitted the brandy since I want this to be kid-friendly.
Mango Custart Tart
MANGO CUSTARD TART

1/2 cup sugar
6 tbsp milk
6 tbsp whipping cream
3/4 cup mango puree
2 eggs, lightly beaten
4 egg yolks, lightly beaten
1 1/2 tbsp Napoleon brandy
1 (9-inch) frozen pie shell

1/4 cup whipping cream
1 tbsp powdered sugar

Heat oven to 350F. In a small saucepan, bring sugar, milk and whipping cream to a boil over medium heat. Remove from heat, cool slightly.
Add mango puree, eggs, egg yolks and brandy. Whisk until well mixed and eggs are completely mixed in. Strain mixture into pie shell. Bake 30 to 35 minutes or until custard is set. Cool completely. Refrigerate until serving.

In a small bowl, beat whipping cream and powdered sugar until stiff. Cut pie into slices. Pipe whipped cream rosette on each slice.

*Note: One ripe medium mango should yield about 3/4 cup puree.

SUBSCRIBE BY EMAIL HERE

Mango on Foodista

Read full post >>

Fresh Lumpia (Vegetable Roll)

08 April 2009 9 comments

Fresh Lumpia This fresh Lumpia is one of my favorite vegetable roll, the other one being Lumpia Ubod (Heart of Palm). This lumpia is mostly vegetable with a little bit of pork and/or shrimps. You can put almost any vegetable you prefer in it, you're the cook, why not? I'm sure there are many variations of this dish just like any other Philippine dish. Mine came from my mom, of course. For the wrapper, I use a regular crepe batter and make it with my crepe maker. If you don't have a crepe maker, you can use a non-stick pan to make it. In the Philippines, some people use the regular Lumpia wrapper sold in the wet market.

FRESH LUMPIA

Filling:

1/2 cup pork, cut into small cubes
1/2 cup shrimps, chopped
1 tbsp cooking oil
salt and pepper to taste (or fish sauce instead of salt)
1/4 cup chicken broth
*all these vegetables are cut into thin and short strips
2 cloves garlic
1 small onion
1 cup string beans or snow pea
1 cup potatoes
1 cup carrots
1 cup singkamas (jicama)
1 cup cabbage


Heat oil and pre-cook the sliced potatoes, set aside. Saute garlic and onions until limp. Add pork and saute until cooked. Add shrimps and season with salt and pepper or fish sauce. Add 1/4 cup chicken broth and the rest of the vegetables except the cooked potatoes. Saute until the vegetables are done but not over-cooked. Drain and let cool down.


Fresh_Lumpia_veggies Fresh_Lumpia_wrapper


Wrapper:
3 large eggs
1 cup cornstarch
2 tbsp. cooking oil
1 1/2 cup water
1 tsp sugar

Whisk the eggs, sugar and water. Add the cornstarch and whisk until well blended. Heat the non-stick pan and brush with a small amount of oil. Depending on the size of the crepe you want to make, pour the right amount on the heated pan. Tip the pan to spread the batter thinly. When the edges begin to separate from the pan, the crepe is done. Repeat until all the batter is used.


Sauce:
3 cups water
3 tbsp soy sauce
1 cup brown sugar
1 1/2 tsp salt
3 tbsp cornstarch diluted in 1 tbsp water
ground peanuts, chopped (optional)
3 cloves garlic, minced (optional)

Mix all ingredients except the diluted cornstarch. Cook until it boils, lower heat. Add the cornstarch mixture and mix. Cook until thickened. Add peanuts and garlic in the sauce or if you prefer, sprinkle these on top of the wrapped lumpia and sauce when ready to serve.

Fresh_Lumpia1


To serve:
Use one crepe and place a piece of lettuce on one side. Add the right amount of filling on top of the lettuce. Fold the bottom part over and then fold the sides of the crepe. Secure with a toothpick.

Read full post >>

Chewy Jumbo Chocolate Chip Cookies

29 March 2009 5 comments

Chewy_Chocolate_Chip_CookiesCHEWY JUMBO CHOCOLATE CHIP COOKIES

I had been searching for the perfect chocolate chip cookie recipe for a long time now. I've had a lot of flops and mediocre cookies, the recipes of which I got from the internet. There was a time when the cookie was as flat as a lace cookie. The dough just melted when it was baking. What a disaster! All I wanted was a chocolate chip cookie that is not dry and one that doesn't crumble into pieces when you bite into it. I wanted a cookie that is chewy and moist. I wasn't planning on using this recipe, I had another recipe I wanted to try. I actually found this recipe by accident. It was printed inside the box of Land O Lakes butter. This recipe yields about 26 jumbo cookies. That's right, it is huge. Of course, you can make it into whatever size you prefer, just adjust the baking time. After tasting this chocolate chip cookie, I knew that my search is over for the perfect recipe.


4 1/2 cups all-purpose flour
1 tsp baking powder
1 tsp baking soda
1 1/2 cups butter, softened (3 sticks)
1 1/4 cups sugar
1 1/4 cups firmly packed brown sugar
2 eggs
1 tbsp vanilla
2 cups semi-sweet chocolate chips (12-oz bag)

- Heat oven to 375F. Combine flour, baking power and baking soda in a bowl and set aside.
- Combine softened butter, sugar and brown sugar in a bowl. Beat at medium speed, scraping bowl often until creamy. Add eggs and vanilla. Continue beating until well mixed. Reduce speed to low. Beat, gradually adding flour mixture until well mixed. Stir in chocolate chips.
- Drop dough by 1/4 cupfuls, 2 inches apart, onto ungreased cookie sheets. Bake for 10 to 14 minutes or until light golden brown. Do not overbake. Let stand 1 to 2 minutes. Remove from cookie sheets.

SUBSCRIBE BY EMAIL HERE

Read full post >>

Crispy Sweet and Sour Pork

24 March 2009 3 comments

Sweet and Sour Pork

SWEET AND SOUR PORK
I tried a lot of recipes for the batter to use for the dish Sweet and Sour and let me tell you, there are a lot of recipes that doesn't hold up to the sauce. What you'll usually end up with is a soggy mess with the batter falling off the viand. The good news is, I found a batter recipe that stays put. It is a lot of work so if you don't like a recipe with a lot of steps, my advice is to order out from the Chinese restaurant down the road. The batter is deep fried twice for extra crispiness. (I know, some of you will cringe but hey, you're only supposed to have this dish once in a while, not every week.) In lieu of pork, you can substitute chicken, shrimps or fish. If you are diabetic, you can substitute splenda (just add it at the end of the cooking steps for the sauce.)


Sweet and Sour Shrimps SWEET AND SOUR SHRIMPS


SWEET AND SOUR
Serves 4-6
1/2 cup carrots, sliced
1 small bell pepper, cut into 1-inch cubes
1/2 cup pineapple chunks, drained
1/2 cup all prupose flour
1/4 cup cornstarch
1/2 tsp baking powder
1 tbsp beaten egg mixed with enough water to make 1/2 cup
1 tsp cooking oil
1/2 lb pork, cut into 1-inch or smaller cubes
1 tsp dry sherry or cooking wine
1/4 tsp salt
ground black pepper to taste
Sauce:
1/2 cup sugar
1/3 cup catsup
1 tbsp light soy sauce
1/2 tsp salt
1 cup water
1/2 cup cider vinegar
3 1/2 tbsp cornstarch dissolved in 1/3 cup water
cooking oil for deep frying

- Parboil carrots in boiling water for 1 minute. Add the bell peppers. When it comes back to boil, drain and rinse in cold water to stop cooking.

- Add the pineapple to the veggies and set aside.
- Combine flour, cornstarch, baking powder, egg mixture and oil in a bowl. Mix until well-blended. The batter will be like a thick paste. Set aside.

- Mix the pork, sherry, salt and pepper. Set aside.

- In a deep pan, heat oil to a temperature of 375F to 400F. This is very important so the batter will not soak up too much oil.

- Dip the marinated pork into the batter and coat completely.
- Carefully drop the battered pork into the oil, a piece at a time.

- Fry until golden brown.
- Remove the browned pork and dry on paper towels and let cool.

- Mix the sugar, catsup, soysauce, salt and water in a saucepan.

- Bring to a boil and add the vinegar. Do not stir. Let boil for 10 minutes.

- Stir in the cornstarch/water solution. Cook until the sauce thickens.

- Add the vegetables and pineapples to the sauce. Add 1 tsp. of hot oil from the deep-fry pan to give the sauce a shine.


- While preparing the sauce, reheat the oil to 400F for the second frying.

- Add the cooked pork and fry until the pieces are heated and crisped.

- Drain on paper towels.
- Serve with the sweet and sour sauce poured on top.


TIPS:
- You can make the pork in advance. After the first frying, you can keep in the refrigerator or in the freezer for a few days. Thaw first before frying for the second time.

- The oil can be re-used if kept in the refrigerator.


SUBSCRIBE BY EMAIL HERE

Read full post >>

Pork Medallions with Apricot-Orange Sauce

17 March 2009 5 comments

PORK MEDALLIONS WITH APRICOT-ORANGE SAUCE

One of the leanest part of the pork is the tenderloin that is why it is my husband's favorite. This recipe calls for sliced pork tenderloins but I prefer whole tenderloins since this keeps it moist. I brown the sides of the whole tenderloin on the stove top and finish cooking it in the oven at 350F. The roasting time depends on the size of the pork tenderloin. I use a meat thermometer and cook the tenderloin until the internal temperature reaches 165F. I usually serve roast pork with homemade applesauce or apple compote. I saw this recipe from Cooking Light magazine and decided to try it. Each serving (2 slices) has 236 calories. If you don't have dried apricot, you can substitute fresh apricots, peaches or nectarines. The sauce was a little tart for my family's taste so I added a teaspoon or so of sugar.


1 tbsp olive oil
1 lb pork tenderloin, cut into 1-inch thick slices
1/2 tsp salt
1/4 tsp black pepper
1 cup thinly sliced onion
1/2 cup dried apricots, sliced
1/2 cup fat-free, less-sodium chicken broth
2 tsbsp orange juice
2 tsp minced garlic
1/8 tsp black pepper
1 tbsp flat-leaf parsley, chopped

-Heat 2 tsp oil over medium-high heat. Season pork with salt and pepper. Fry pork and cook for 3 min. or until browned. Remove from pan and keep warm.

- Heat remaining 1 tsp oil in pan. Add the onions, saute until tender. Stir in apricots, chicken broth, orange juice and garlic; bring to boil. Cook until the sauce is slightly thickened. Remove from heat and stir in parsley.

- Serve sauce over pork.


SUBSCRIBE BY EMAIL HERE

Read full post >>

Sans Rival - Oh My Goodness!

02 March 2009 13 comments

Sans Rival SANS RIVAL

What do you get when you mix meringue, buttercream and almonds? Sans Rival, what else? The photo and title says it all, what more can I add to it? Delicious, rich, mouth-watering, diet buster, calorie laden dessert. Ah, one shouldn't think of diets when enjoying this dessert. This is one of those rare times that eating it is worth sacrificing 1 day off your healthy lifestyle. That's why you don't eat Sans Rival every week, you're only allowed to have this dessert uhm once every year? Ok, maybe once every six months.


The name Sans Rival is French, meaning 'without rival'. Nobody knows where this dessert originated but it sure has some European characteristics. It's like Napoleons. It's an Almond torte and consists of layered crispy meringue with almonds and buttercream. There is also another dessert that is similar to this called Sylvannas, the only difference being the Sylvannas is shaped like a huge egg but it tastes the same.

I grew up eating Sans Rival from Goldilocks. This is one of my favorite desserts from that popular Filipino bakery along with Mocha and Ube rolls. When I moved to Northern California 20 years ago, I was ecstatic when I learned that Goldilocks is just a drive away. I got a sticker shock though, a small square of Sansrival costs $25 (back then). No wonder it's expensive, it's a little complicated to make this. There aren't a lot of ingredients but it takes a lot of work to assemble the whole thing. After many years of wanting to try to make this dessert, I finally did it two weeks ago. I was thinking of what dish to bring to a party when I decided to make dessert. It turned out quite good, very good, in fact. Would I make it again? Hmm, yes I will (if somebody pays me to do it LOL). I used almonds instead of cashew nuts just because. If you are a novice baker, then I would suggest you buy it instead of trying to make it. :o) For an expert baker, this is quite easy to make. All you need is a lot of patience and Reynolds Release non-stick aluminum foil. If you don't have this special aluminum foil, use baking paper or parchment paper.


SANS RIVAL
for the wafers:
10 egg whites at room temperature
1/4 tsp cream of tartar
1 cup sugar
2 cups finely chopped almonds
for the filling and frosting:
6 egg yolks
1/2 cup light corn syrup
2 tbsp water
1/4 cup sugar
2 sticks butter at room temperature (1/2 lb)
for the topping:
1/2 cup finely chopped almonds
- Beat egg yolks until it turns light yellow.
- Heat corn syrup, sugar and water over low heat. Cook for 2 minutes after it boils.
- Pour the syrup into the egg yolk slowly while beating on medium speed. Set aside to cool down.Cream softened butter and gradually beat in cooled yolk mixture.Set aside.
- Preheat oven to 325F. Line three cookie sheets or jelly roll pan with parchment paper. Generously grease and flour the parchment paper (very important so the meringue will not stick; if you use the Reynolds Release foil, then you don't have to grease and flour)
- Beat egg whites and of tartar until soft peaks form. Add sugar a tablespoon at a time, beating well after each addition. Beat until stiff.
- Fold in ground almonds.
- Spread evenly on the cookie sheets about 1/4 inch thick. Bake for about 30 minutes or until golden brown.
- Cut the wafer into desired size while still warm. Peel off the paper or foil. If the parchment paper is sticking, cover with damp towel for a minute or so.
- Spread the frosting thinly on top of each meringue and stack another meringue, repeat with the layering . Don't put too much frosting in each layer or you wouldn't have enough to frost the outside of the Sans Rival.
- Sprinkle chopped almonds on the top and sides. Chill in the fridge for a couple of hours.


SUBSCRIBE BY EMAIL HERE

Read full post >>

Thai Barbeque Chicken

25 February 2009 4 comments

Thai Barbeque Chicken

THAI BARBEQUE CHICKEN

This is a recipe from a book Keo's Thai Cuisine by Keo Sananikone. He owns the Mekong and Temples of Thai Cuisine restaurants in Hawaii. This barbequed chicken is very good, you can detect a hint of coconut milk, lemon grass and ginger so it is important to marinate the chicken for more than an hour. To achieve crispy skin, I increased the temperature to 500 degF at the last 15 minutes of baking.

THAI BARBEQUE CHICKEN
1 whole chicken
2 stalks fresh lemon grass
1/2 tbsp coarsely chopped fresh ginger
3 large garlic cloves
2 shallots
1 1/2 tbsp brown sugar
1/4 cup coconut milk
1 tbsp fish sauce
1 tbsp soy sauce
1 tbsp cooking oil

Rinse chickens and pat dry. Split chicken down the breast but do not cut all the way throug; press open. Place chicken in a large bowl. In a food processor or blender combine the rest of the ingredients and blend until smooth. Pour this sauce over the chicken and marinate overnight in the refrigerator.

Preheat oven to 350degF. Place chicken on a rack with the split side down. Bake for about 1 hour, depending on the thickness of the chicken, or until the juices run clea when the thigh is pierced with a sharp knife. I use a cooking thermometer to check the temperature of the thickest part of the thighs.


SUBSCRIBE BY EMAIL
HERE

Read full post >>
Light Yet Delicious Carrot Cake with Cream Cheese Frosting

20 February 2009 9 comments

LIGHT CARROT CAKE


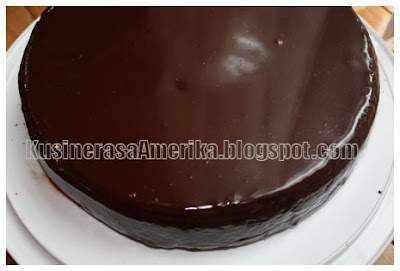
Carrot cake is one of my favorite cakes. It somehow lessens the guilt of eating cakes when you know that it has a vegetable in one of the ingredients. Even though this type of cake is good, it still packs a large amount of calories. A typical carrot cake with cream cheese frosting (3 oz slice) contains 425 calories. Yikes! This recipe from Cooking Light magazine is 100 calories less than the regular recipe. It also has coconut flakes, crushed pineapple and pecans (which I omitted since I don't like any kind of nuts in my desserts). Since I didn't have crushed pineapple, I used apple sauce (1 cup). Even with the substitutions, the resulting cake still was delicious. Dh loved it and commented that it is so light and moist. I only used half the amount of confectioner's sugar in the frosting and it was still too sweet for my taste. So next time I make the frosting, I will only use 1 cup confectioner's sugar and omit the butter entirely. I'm sharing the original recipe so you can tweak it to suit your taste.

Cake:
1 1/2 cups all-purpose flour (about 6 3/4 ounces)
1 1/3 cups granulated sugar
1/2 cup sweetened flaked coconut
1/3 cup chopped pecans
2 teaspoons baking soda
1 teaspoon salt
2 teaspoons ground cinnamon
3 tablespoons canola oil
2 large eggs
2 cups grated carrot
1 1/2 cups canned crushed pineapple, drained
Cooking spray

Frosting:
2 tablespoons butter, softened
1 (8-ounce) block 1/3-less-fat cream cheese, softened
3 cups powdered sugar
2 teaspoons vanilla extract
Additional grated carrot (optional)
Preparation
Preheat oven to 350°.

To prepare cake, lightly spoon flour into dry measuring cups; level with a knife. Combine flour, sugar, coconut, pecans, baking soda, salt, and cinnamon in a large bowl; stir well with a whisk. Combine oil and eggs; stir well. Stir egg mixture, grated carrot, and pineapple into flour mixture. Spoon batter into a 13 x 9-inch baking pan coated with cooking spray. Bake at 350° for 35 minutes or until a wooden pick inserted in the center comes out clean. Cool completely on a wire rack.

To prepare frosting, combine butter and cream cheese in a large bowl. Beat with a mixer at medium speed until smooth. Beat in powdered sugar and vanilla just until smooth. Spread frosting over top of cake. Garnish each serving with grated carrot, if desired.


Read full post >>

Easy Chicken Cordon Bleu

14 February 2009 4 comments


EASY CHICKEN CORDON BLEU

The original recipe for Chicken Cordon Bleu takes a lot of work. It takes a while to prepare it. It entails pounding the chicken breast, dipping it in flour, egg and bread crumbs, then you put it in the fridge to have everything set. This recipe is from Kraft Food and Family. It is very easy to make and prep time is less than 15 minutes (for me). Of course, nothing beats the original recipe but if you don't want to toil in the kitchen and still get the same taste (almost) then you should try this. It has become my family's favorite. If you're not a fan of mustard, you can omit this ingredient or use just a teaspoon like I did. This recipe used a lot of Kraft products (of course) but you can use whatever brand is available. You can also omit using stuffing mix, it doesn't make much difference. In the photo below, the serving on the left side is for my son who doesn't care for stuffing.


EASY CHICKEN CORDON BLEU
1 pkg (6 oz) stuffing mix
6 small boneless skinless chicken breast halves
6 slices ham
1 can condensed cream of chicken soup
1 tbsp Dijon mustard
6 slices Swiss cheese


Preheat oven to 400 deg F. Prepare stuffing mix as directed on package. Set aside.
Place chicken in 13x9- inch baking dish; cover with ham. Mix condensed cream of chicken soup and mustard; spoon over chicken. Top with prepared stuffing.
Bake for 25 min. or until chicken is cooked through (the internal temperature should be at least 165 deg F). Top with cheese slices and bake an additional 5 min. or until cheese is melted.
Makes 6 servings.

SUBSCRIBE BY EMAIL HERE

Read full post >>

Sauteed Scallops with Corn Salsa

10 February 2009 4 comments

Sauteed Scallops with Corn Salsa SAUTEED SCALLOPS WITH CORN SALSA

Usually, when I cook scallops, I just roll it in bread crumbs, fry it and serve it with lemon wedges and sometimes cocktail sauce. I decided to try something new and found a recipe by Gordon Ramsay. This one is from his book Gordon Ramsay's Fast Food. We liked the hint of curry, it doesn't overpower the scallops. This is pretty easy and takes less than 30 minutes to prepare. For this recipe, it is ideal to use Sea scallops, these are the big ones. The original recipe calls for 3 tbsp. of Sesame oil, I only used 1 tbsp. I didn't have Arugula so I used Spinach. Here's the recipe:


SAUTEED SCALLOPS WITH CORN SALSA
Sea scallops, cleaned
1/2 tsp medium curry powder
2 tbsp olive oil
arugula leaves

Corn Salsa:
14 oz can corn, drained
cherry tomatoes, quartered
1 small red onions, minced
1/4 tsp chili pepper flakes
2 scallions, sliced finely
1 tbsp sesame oil
1 tbsp cilantro, chopped
juice of 1 lime
dash of light soy sauce
salt and ground black pepper

For the salsa:
Mix all the ingredients and stir over medium heat for about 2 minutes. Set aside.


If the scallops are thick, slice it horizontally into two disks. Mix the curry powder with 1 tsp. salt and sprinkile over the scallops. Heat a large skillet over high heat and add the oil. Cook the scallops for 1 minute each side until golden brown at the edges. Don't overcook.
Spoon the salsa onto the plate and arrange the scallops on top. Serve immediately.

SUBSCRIBE BY EMAIL HERE

Read full post >>
Pineapple Sweet and Sour Meatballs

03 February 2009 6 comments

Sweet and Sour Meatballs
PINEAPPLE SWEET AND SOUR MEATBALLS
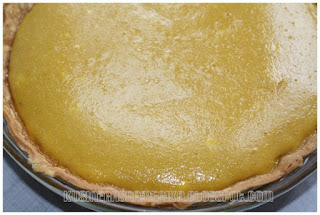
This is one of those fast meals that I whip up when I don't have much time to spend in the kitchen. What's nice about this recipe is you can skip making the meatballs from scratch and use the frozen Italian or Swedish meatballs in the freezer. Of course, if you're feeling like Martha Stewart, then by all means, go ahead and make it from scratch. :o) I found the original recipe online but tweaked it to suit my taste. I added catsup (the sauce needed more color), lessened the brown sugar (too sweet) and vinegar (too sour), etc. That's what's good about cooking, you can change a recipe according to your taste. Here's my final (for now) recipe:


Pineapple Sweet and Sour Meatballs

Meatballs:

1 lb ground beef
1 egg, beaten
1/2 cup panko or bread crumbs
1 small onion, minced
1 tsp salt
1/4 tsp ground black pepper
1 tsp Worcestershire sauce

Preheat oven to 350 deg F. Lightly oil a jelly roll pan or cookie sheet. Mix the ingredients for the meatballs. Shape into small balls and bake for 30 mins or until fully cooked.


Pineapple Sweet and Sour Sauce:
1 can pineapple chunks, drained
1 med carrot, sliced thin (so it will cook quickly)
1 red bell pepper, cut into squares
1 small onion, quartered
3/4 cup pineapple juice (you can use the juice from the pineapple chunks)
1/3 cup water
1 tbsp vinegar
1 tbsp soy sauce
1/4 cup brown sugar
1/3 cup catsup
3 tbsp cornstarch dissolved in 1/3 cup water
salt if needed


While the meatballs are in the oven, prepare this sauce. In a medium sauce pan, mix pineapple juice, water and soy sauce. Bring to boil. Add the vinegar but do not mix. Bring it up to boil then mix. Add brown sugar and catsup and mix until the sugar is dissolved. Throw in the carrots, onions, pineapple and red bell pepper.
Add the cornstarch/water mixture a little at a time thoroughly mixing after each addition. Stop adding the mixture when it's at the consistency you prefer. Try the sauce and add salt to suit your taste.

You can serve the meatballs mixed in with the sauce or serve the sauce on the side. You can pair this with steamed rice or cooked pasta.

SUBSCRIBE BY EMAIL HERE

Read full post >>

Mexican Taco Pie

31 January 2009 2 comments


MEXICAN TACO PIE

My family loves Mexican food. I always make beef Tacos, Enchiladas, Carne Asada and Chimichangas. I wanted to make something new so I tried this recipe. I made a couple of modifications to suit my family's taste. You can make this sans refried beans. If you like salsa, then by all means, add it as another layer.


Mexican Taco Pie
1 lb. lean ground beef
1 medium onion, chopped
1 can Refried Beans
1 4 oz. can chopped green chilies
1 pkg. taco seasoning 1 pkg. flour tortillas
2 c. shredded shredded Mexican mixed cheese
1. Grease a pie pan with oil. Pre-heat the oven to 350 deg F.
2. Saute onions in a little oil. Add ground beef and a pinch of salt and pepper. Cook until brown. Strain the cooked ground beef to take out excess oil.
3. Return to heated pan. Prepare the taco seasoning according to the directions on the packet. Add to the cooked ground beef. Simmer for 5 minutes. Set aside. 4. Place two pieces of tortillas on the bottom of the pan. Spread some refried beans evenly on the tortillas. Follow with the ground beef. Sprinkle some green chilies on top, then the Mexican shredded cheese.
5. Place two more pieces of tortillas on top and repeat with the refried beans, ground beef, green chilies, cheese. Do this until you reach the top of the pie pan. 6. Sprinkle some extra cheese on the top to get a crunchy topping or you can place one layer of tortilla then the cheese if you want an extra crunchy top.
7. Bake for about 30 minutes when everything is all bubbly and crunchy.
8. Let cool for 5 minutes and slice. Serve hot.


SUBSCRIBE BY EMAIL HERE

Read full post >>

Lumpia Shanghai, Filipino Spring Roll, Filipino Egg Roll

26 January 2009 6 comments

Lumpia Shanghai Lumpia Shanghai is one of the most popular Filipino dish here in the U.S. If you ask an American who has a Filipino friend, co-worker or family member, what their favorite Filipino food is, most likely they'll tell you it's Lumpia. My husband's family like it so much that they always ask me to cook some everytime we get together for special occasions.

This is an easy recipe, it's similar to making meatballs. The only difference is that making it is very tedious since you need to roll each and every one. If you don't eat pork, you can substitute ground turkey, chicken or beef. Some recipe calls for water chestnuts but I find that unless you intend to cook these right away, it is best to omit this ingredient. The water chestnut adds moisture to the lumpia which will make the wrapper soggy if you plan to freeze it. I use the food processor to mince the onions and carrots just to save time.

The spring roll wrappers can be found in any good Asian grocery. I use these wrappers instead of the 'egg roll' wrappers because it is thinner. Each bag has 25 wrappers. I cut the lumpia in half before frying so I get 50 small lumpias in all. I added the step-by-step photos on how to roll the lumpia if you do not know how to go about it. I either use beaten egg or a mixture of flour and water boiled into a paste to seal the lumpia. I hope it helps. :o)

Here is the recipe:

LUMPIA SHANGHAI

1 LB. ground pork
1 medium carrot, minced
1 small onion, minced
3 cloves garlic, minced (optional)
3 stalks green onion, chopped
1 egg, beaten
salt and pepper to taste

Mix all ingredients in a bowl. I fry a small pattie of the mixture just to test if it needs more salt or pepper. Peel off one spring roll wrapper and cover the rest with a towel to prevent it from drying out. Put one tablespoon or less of the mixture in the middle of the wrapper as shown in the photo. Shape it with your spoon so that it resembles a thin cigar. Brush some beaten eggs on both corners and fold across. Always brush the corner to be folded with the beaten eggs and fold as shown in the photo. Try to fold it as tight as possible. Don't forget to seal the edges (photo #4) with beaten eggs. Fry in medium high heat until golden brown.

You can freeze the lumpia up to 2 months. You don't need to thaw it before cooking. I just cut the lumpia in half and fry it.

Serve with sweet and sour sauce or duck sauce.


SUBSCRIBE BY EMAIL HERE

Read full post >>

Falling Off the Bones Back Ribs

20 January 2009 8 comments


I served this Barbequed pork baby back ribs on my daughter's birthday party last weekend. I forgot to take a proper photo (!), good thing I saw a photo of one of the guests holding this plate with the ribs. LOL Anyway, it is REALLY good. I got a lot of compliments about it. The good thing is that you use a slow-cooker for this, isn't that great? By the time the ribs are done, it is literally falling off the bones, hence the title of this post. Try it and you'll see what I mean. Here is the recipe.


Ingredients:
4 pound pork baby back ribs
salt and pepper to taste
1 1/2 cup Barbeque sauce
1 1/2 cup ketchup
1/4 cup packed brown sugar
2 tablespoons vinegar
2 teaspoons dried oregano
2 teaspoons Worcestershire sauce
1 dash hot sauce

Directions:
1. Preheat oven to 400 degrees F (200 degrees C).
2. Season ribs with salt and pepper. Place in a shallow baking pan. Brown in oven 15 minutes. Turn over, and brown another 15 minutes; drain fat.
3. In a medium bowl, mix together the barbeque sauce, ketchup, brown sugar, vinegar, oregano, Worcestershire sauce, hot sauce, and salt and pepper.
4.Place ribs in slow cooker. Pour sauce over ribs, and turn to coat.
5. Cover and cook on Low 6 to 8 hours, or until ribs are tender.


SUBSCRIBE BY EMAIL HERE

Read full post >>

Chicken, Chorizo and Shrimp Paella

16 December 2008 8 comments

This is one of my favorite dishes. It is simple and easy plus you only need one pan to cook it, less washing for me. :o) The secret to a great Paella is the Saffron. It gives this dish an exquisite flavor in my opinion. Saffron is quite expensive but is essential for a real Paella. I also have a Paella pan to cook it in. If you don't have one, you can use any saute pan that is big enough. You can also cook it in a regular wok and transfer it to a baking dish. I took this photo while the Paella was still cooking so it has some liquid left.

The recipe I used didn't call for shrimps but I added it anyway since I love it and I'm the cook. LOL If you are adding shrimps, do it at the last 5 or so minutes of cooking, depending on the size of your shrimps. If you'll notice in the photo, only one half of the Paella has green peas, that's because my husband hates it while I like it. LOL The recipe also calls for roasted chicken but if you don't have left-over chicken, you can use fresh chicken. I put salt and pepper on fresh chicken and fry it it a little oil.

Here is the recipe I used from Epicurious.


Quick Chicken and Chorizo Paella
Epicurious September 1999

Yield: Makes 4 to 6 servings

1 tablespoon vegetable oil
14 ounces chorizo, cut into 1/2 inch slices on the diagonal
1 small onion, chopped
1 red bell pepper, chopped
2 cloves garlic, chopped
1/4 teaspoon pimenton or paprika
2 cups short- or medium-grain rice
1 pinch saffron threads
2 bay leaves
4 cups chicken stock
1 1/4 pounds roast chicken (meat from 3-pound chicken skinned, deboned, and torn into chunks)
1/2 cup frozen peas
1 tomato, chopped
Coarse salt and freshly ground black pepper to taste

Heat oven to 400°F. Heat oil in a large casserole or paella pan over high heat. Add chorizo and cook until browned and fragrant, about 1 minute. Add onion, red bell pepper, and garlic. Cook, stirring occasionally, until vegetables are tender, about 3 minutes.

Add rice (medium or short grain rice), pimenton, saffron, and bay leaves. Stir to combine and coat the rice, about 1 minute. Add chicken stock and bring to a boil. Add roast chicken, frozen peas, and tomato; stir to combine.

Transfer skillet to oven. Cook uncovered until rice is tender and no liquid remains, about 20 minutes. Remove from the oven. Fluff with a fork and serve immediately.

SUBSCRIBE BY EMAIL HERE

Read full post >>