What's My Steak? Bistek

28 April 2008 15 comments

Filipino Beef Steak

You would think that having been living here in the US for 19 years, I would swear off eating Philippine beef steak. Uh-uh, I still crave for Bistek as I call it from my younger days. I like the salty sauce on top of piping hot rice and the crunchiness of the onions with the beef. They say that this is the poor man's steak, I don't know about that since beef round and tenderloin are so expensive.

The type of soy sauce that you use is crucial to this dish. Use soy sauce that is not too salty. I find that Silver Swan brand is too salty for me so I use Marca Pina. I have not tried using Kikoman Lite Soy Sauce for this but I would guess that it will turn out fine since it's not too salty like the original. Using Vidalia onions is also recommended since the sweetness of these type of onions complement the saltiness of the sauce. If you are using a part of the beef other than the round, I suggest you pound the beef slice with a mallet or something similar to tenderize it. I remember my mom using the back of the knife to pound the beef, so it's not cutting through the meat. As with any cooking recipe, this can be tweaked according to your taste.

PHILIPPINE BEEF STEAK "BISTEK"

1 lb. Beef round or tenderloin, sliced thin
1/2 cup soy sauce
Juice of 1 lemon
ground pepper
1 big onion, sliced across so you'll end up with rings

1. Mix soy sauce, ground pepper and lemon juice in a big bowl.
2. Add the sliced beef and mix with your hands. Let sit in the fridge for 30 min.
3. Heat oil in a big pot.
4. Fry the onions up to the consistency you prefer. I prefer my onions to be soft, some like it crunchy. Set aside.
5. Fry the beef but do not over cook. Remember that the beef slices are thin so it does not take long for it to cook. Over cooking the beef will result in tough and dry meat. Set aside the cooked meat while you're cooking the rest of the meat.
6. Pour the sauce in the pot and cook for 2 minutes.
7. Arrange the beef slices in a serving bowl and put the cooked onions on top. Pour the cooked sauce over the meat and onions.
8. Serve over hot rice.

SUBSCRIBE BY EMAIL HERE

Read full post >>

Do We Need To Stock Up On Rice?

23 April 2008 8 comments

Have you heard? There is rice shortage everywhere. Sam's Club, a warehouse club here in the US is limiting the number of rice bags that customers can purchase to four. Apparently, there are a lot of people sending rice back to their relatives in other countries. All food prices have gone up, what's next, a flour shortage?

In the Philippines, there are demonstrations to protest the rice shortage.The government said that the main cause of this is hoarding. A lot of unscrupulous merchants are keeping the rice and waiting until the price is high enough for them to sell. I cannot comprehend why the government will not do something about it. Ok, they say that they trying their best to curtail this problem but I don't think they are doing enough.
Photo Credit:Romeo Ranoco

What do you think is causing this global shortage of rice? One cause could be the popularity of using BioFuel which they said is better for the environment. Governments are giving subsidies to farmers to plant grains that can be used to produce biofuel. So fewer food crops means higher food prices. They are doing this all over the world, including Asia and North America.

I heard on the morning news that here in the US, most farmers are now planting corn instead of rice. Why? The government gives the farmers subsidies to plant corn which can be converted to Ethanol. Ethanol on the other hand is used as an additive to fuel here in the US which makes the US less dependent on oil. It also makes the oil burn more efficiently and cleanly. But what they are not telling us is that making Ethanol cost more energy to produce. It is so convoluted that you need to take notes to remember the pros and cons.

Now the question is, what is more important, feeding the people or keeping the environment clean? It certainly is a double-edged sword. In my opinion, we need to tackle the rice shortage and rising food prices first and then figure out other ways to keep the environment clean.

Read full post >>

Use Your Noodle, Make Pancit Canton

21 April 2008 6 comments

Pancit Canton

Are you a noodle lover like me? I love to eat most noodles and one of my favorites of course is the Filipino Pancit. As with most Asian cuisines, there are different types of noodles in Filipino cuisine. One of them is Pancit Canton. It is not original Filipino 'per se' since it came from the Chinese but with the mixture of cultures these days, one does not care as long as it tastes good.

The perfect Pancit Canton for me has noodles that are 'Al- Dente' and has a lot of sahog (ingredients). I remember having pansit that barely has any sahog, it's all noodles and maybe twenty pieces of cabbage. LOL The cook does not eat veggies so she did not care to add more. Anyway, when I cook any kind of Pancit, I add whatever vegetables I have on hand which is usually Spinach, Carrots, Celery and Onions. If I have Bokchoy or Cabbage, I add that too. Shrimps are a must and either Chicken or Pork. Dh prefers Chinese roast Pork so I add that. I like Chinese Sausage but don't use it because dh does not like the taste. Basically, you can add anything you want. :)


For the noodles, I prefer to use fresh ones. The difference is amazing, when you bite on it, it feels 'springy' or 'elastic. But of course, we do not always have fresh noodles on hand. That's where the dried noodles come in handy. Pancit Canton noodles are the yellow kind, you can also use Chinese egg noodles. I find the Pancit Canton from the Philippines a little salty so I prefer to use the Chinese egg noodles
PANCIT CANTON

3 cloves Garlic,minced
1 medium Onion, chopped 1 cup boiled pork, diced
1 cup shrimp, shelled, deveined and halved
1 medium carrot,julienned
1 stalk Celery, julienned
1 Bokchoy or 1 cup spinach, chopped

Sauce:
2 tsp soy sauce
1 tsp sugar
1 tsp sesame oil
1 tsp Chinese white rice vinegar or distilled vinegar
1 tsp Shao-Hsing wine (Chinese cooking wine)
Pinch of ground white pepper
1 ½ tsp cornstarch
1 cup chicken broth

1. Place the water in a pot and bring to boil over high heat. Add the noodles, stir and cook for 2-4 mins. for fresh noodles and 4-7mins. for dried noodles . depending on the size. Turn off heat and run cold water into the pot and drain.

2. Combine the sauce ingredients and set aside.

3. Heat the oil and add the garlic and stir. When the garlic is golden brown, add the onions and cook for a minute. Add the pork and shrimp. Saute for a minute or until the shrimp turns pink. Add the carrots, celery and Bokchoy stems. When these have softened slightly, add the Spinach and Bokchoy leaves. Make a well in the middle,stir the sauce mixture and pour into the pan. Stir well and cook until the sauce thickens.

4. Add the cooked noodles into the pan and mix until the noodles are coated with the sauce and vegetables are evenly distributed.

5. Serve in a platter with sliced lemons and soy sauce on the side.


SUBSCRIBE BY EMAIL HERE

Read full post >>

What's In My Palayok? Kare-kare

17 April 2008 10 comments

Kare-kare

How I wish I have a palayok in my kitchen. No, I'm not going to use it for cooking since my range is electric. :( I am going to use it for presentation. (Note to self: bring back a palayok from my trip to the Philippines next year). How dramatic can you get if you serve Kare-kare in a palayok? That's how they used to do it in Kamayan and Barrio Fiesta restaurants.

I have some Bokchoy and Chinese green beans in the vegetable crisper and thought of making Kare-kare. I have not cooked it in more than a year so what better time to do it than now. Lucky for me, Ox tails are readily available in our local supermarket. I guess I have to thank the big population of Portugese in the area. :) Make sure you also have Bagoong before you even think of cooking Kare-kare. It is just not complete without it, it is like eating Prime Rib without the Au Jus.

There are two ways to cook Kare-kare: the long way and the easy way. The easy way is using Mama Sita's Kare-kare mix. It's okay, just tweak it to your taste. I for one like the taste of the ground toasted rice. This recipe has been tweaked a little. I got it from the cookbook by Laquian and Sobrevinas.

KARE-KARE ( Meat and Vegetable Stew in Peanut Sauce)

2 1/2 lbs. Oxtail
1 1/2 tsp salt or fish sauce
1 tbsp oil
2 cloves garlic, minced
1/2 medium onion, sliced
1/2 cup atchuete water (1 tbsp atchuete seeds and 1/2 cup water)
2 cups broth (from the oxtail)
3 tbsp peanut butter
2 tbsp ground toasted rice
1/2 lb. Chinese green beans
1/2 lb. Bokchoy
1 med. eggplant, cut into pieces

- Place oxtails in a pot and cover with water. Bring to a boil and simmer until tender.
- Soak atchuete seeds in water for 30 min. Stir and press on the seeds to extract color. Strain and set aside.
- Heat oil in a skillet and saute garlic and onions. Add cooked oxtail and 2 cups broth. Add salt and atchuete water. Simmer for 15 min.
- Take a cup of the broth and stir in peanut butter and toasted rice powder. Add to the pot and bring back to boil and simmer for another 5 min.
- Add green beans and eggplant. Cook another 5 minutes. Add the bokchoy and cook for another 5 min.
- Season with salt or if you prefer, bagoong.


SUBSCRIBE BY EMAIL HERE

Read full post >>

Canvas Photo and Art

0 comments


If you are a mom like me then you have tons of photos of your children. It is time to turn those photos into a canvas photo to display in your home. There is a website online that can help you do this. www.photo-print-on-canvas.com offers different services that will fill any need.

For starters, you can have your favorite photo enlarged and put on a canvas. They can also turn your photo into an artwork. The photo shown here has been changed from a regular photograph into an illustration. The other art effects that they offer are Pop Art, Lichtenstein, Che, Opie and Graphic. Each type is explained with samples of each style. You should check out the photos that were turned into different kinds or art, it is just amazing. If you like Andy Warhol's art, you can have your own photos turned into a similar artwork.

WWW.photo-print-on-canvas.com will retouch your photos for free, there are no hidden charges for this service. You can have the background changed, turn the photo into black and white and change the colors. For artistic edit, they only charge a minimal fee for their services. They offer free FEDEX shipping for any order anywhere in the world. The website is user-friendly and if ever you have a question, you have a choice to chat online with their customer service, send them an email or call their office. They also have a FAQ page where common questions are answered.

This kind of photo canvas will make a great gift for anyone. I know I will get a photo canvas for my in-law's 50th wedding anniversary.

Read full post >>

Escabeche

15 April 2008 10 comments

Escabeche Escabeche I think is the Filipino version of the Chinese Sweet and Sour dish although the latter has a sweeter and thicker sauce (not to mention redder). Escabeche solely refers to a dish made with fish and the accompanying sauce which has a delicate balance of sweet and sour. To get the perfect Escabeche sauce, it has to be just a little sweet with a hint of sourness to perfectly complement the delicate taste of the fish. Anything more than that will ruin the whole dish.

I've tried a lot of recipes and found some to be overly sweet or too sour. The kind of vinegar that is used is very important. If you are using a recipe from a Philippine cookbook, I suggest using cane vinegar like Datu Puti. This kind of vinegar is not as acidic as the regular distilled vinegar.

Using whole fish adds a special touch, the dish looks nice when you serve it. Some Americans are queasy when they see whole fish served on the table, what more if they see a whole lechon? I can just imagine my MIL when she sees a lechon complete with the head. She will probably swear off on eating any kind of pork for life. LOL I'm thankful that dh is not like that. Here in our local grocery, they only sell fillets of fish. So every time we go to the Asian grocery near Boston, I always get a whole fish. This time I got a whole Lane Snapper, just the perfect size for the family.

Escabeche
I used an oval-shaped pan to fry the fish. This was the reason I purchased this pan in the first place (NO, I am not a fan of Rachel Ray LOL). I've used the regular round pan and fishes this size don't fit (unless you have a huge kawali from the Philippines :)).


ESCABECHE (Pickled Fried Fish)

1 medium sized fish, cleaned
2 tsp salt
1/2 lemon
1/3 cup oil
2 cloves garlic, minced
1 small onion, sliced
1/2 green pepper, cut into strips
1 tbsp ginger strips
1 carrot, cut into strips
1/4 cup vinegar
1/2 cup water
1/4 cup sugar
1/2 tsp salt
1 tbsp soy sauce
2 tbsp catsup
1 tsp cornstarch, dissolved in 2 tbsp water

*Rub fish all over with lemon. Sprinkle with salt and let stand for half an hour.
*Fry in oil until brown. Set aside.
*Saute garlic, ginger and onions until onions are translucent. Add carrots and saute for 3 mins. Add the green pepper and saute for another 2 mins.
*Add sugar, salt, soy sauce and catsup to the water and mix until dissolved. Pour into the pan with the vegetables. Add vinegar and bring to boil.
*Stir in cornstarch solution and cook until thick and transparent.
*Pour sauce over the fish and serve with white rice.

Source: Filipino Cooking by E.Laquian and I.Sobrevinas


SUBSCRIBE BY EMAIL HERE

Read full post >>

Polvoron Just Like Goldilocks

13 April 2008 18 comments

PolvoronWhen we were still living in California, we were spoiled with having a Goldilocks store in the next town. Whenever dh had some craving for polvoron, we'd drive to Union City and stock up on different pastries. Whenever I or any of my relatives go back to Manila for a vacation, we would bring packs of polvoron as 'pasalubong' for dh and the kids.


Polvoron Molds Now that we live in the East Coast, getting Goldilocks polvoron is not that easy. There are some stores in New Jersey and New York that sell these but of course it costs more and I live four hours away.:( Goldilocks also has an online store but then the shipping costs more than the product you are ordering since they only ship 2nd-day Air. So we just ask my cousin who lives near a Goldilocks store in Southern California to buy the polvoron and ship it to us. It is not cheap either. One bag (12 pcs.) costs $15, they sure have a big profit margin on this one. This set-up worked out fine until the last shipment.


Polvoron
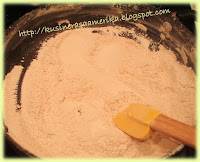
It tasted different this time. Dh noticed it too. Gone are the rich and buttery taste. Now it is bland and dry. Because of this, I decided to make my own polvoron. And why not? I remember making this during Home Economics in sixth grade. :) I also have the polvoron molds sitting in a drawer, I asked my mom to get these for 3 years ago. I have not used it since I received it, I guess I'd better start now.


These polvoron tastes just like Goldilocks'. Making it is very easy and definitely costs less $. I used a stand mixer to incorporate the rest of the ingredients into the flour, it is much easier that way. The kids enjoyed helping me make the polvoron. It is very easy for them with the help of the mold. If you would like to wrap these, you can use 'tissue paper' (like the ones you use for gift bags).


Polvoron

1 cup sifted All-purpose flour
1/2 cup full-cream powdered milk (KLIM or Nido)
1/2 cup sugar
1/2 cup soft butter
1/2 tsp vanilla extract

-Toast the flour in a pan over medium heat.

-Stir continuously until light brown.
-Transfer the toasted flour to a mixing bowl.
-Add the rest of the ingredients to the bowl and mix
well.
-Use the polvoron mold to form the mixture.
-Refrigerate for at least 30 minutes.

Variations:

Pinipig Polvoron:
Add 1/4 cup toasted Pinipig

Chocolate Polvoron:
3/4 cup All-purpose flour
1/4 cup sifted cocoa powder
1/2 cup full cream powdered milk
3/4 cup sugar
1/2 cup soft butter

*** I'm expecting a shipment of polvoron molds this summer. Send me an email at kusineraUSA at yahoo dot com to place an order. ***


Subscribe to receive more recipes by email. You will only get emails when there is a new recipe posted. No SPAM or adverts. SUBSCRIBE BY EMAIL HERE

Read full post >>

Should I?

12 April 2008 6 comments

I've been thinking if I should get my own domain for this blog. I did it for my other blog, why not for this one? Well, I was going to do it at first, but then I had a bad experience with the other one. :(

I found out that Google use different registries so when you choose to customize your blog, you may end up having a domain registered to GoDaddy.com, Enom.com or some other registry. I know what you are thinking "So, what?" Well, not if the registry wants you to pay extra $ to keep your registry info private.

That is exactly what happened to moi. My domain was registered by Google through Enom.com. Lo and behold, I saw my personal info laid out on the WHOIS page for all of the world to see (including low lifes such as spammers, etc.) Yup, my whole name, home address, phone number and email address was all on that page. D*%#! So I went to Enom and found out that their privacy service costs extra. D*%# again!

So now I am having second thoughts of getting a domain for this blog. *sigh* I guess I do not have any choice but to bite the bullet and pay my hard-earned blogging $ to Enom. :(

Well for now anyway, I still do not have any domain name in mind. What do you think a good domain would be for my blog? Kusinerasaamerika.com is too long in my opinion. How about kusineraUSA.com or kusineraUS.com? Any suggestions?

Read full post >>

Scrambled Eggs With Shrimps

10 April 2008 8 comments

Scrambled Eggs With Shrimps My sister Giselle used to work in the Embarcadero area in San Francisco. There is a small Chinese restaurant a block away from her office and it is where they always eat for lunch. She brought me this Scrambled Eggs with Shrimp dish one day from work. I never thought that eggs with shrimp would taste so heavenly, but it does. (My personal opinion, of course. :)) If you are an egg and a shrimp lover, this dish is for you. You can make different variations of this dish, make it as complicated as you want by adding veggies or spices. I for one prefer it just the way it is.


You can use pre-cooked shrimp in this recipe but you wouldn't get the wonderful shrimp taste in the eggs so it is better to use fresh shrimps. If you like, you can add onions or tomatoes, you can saute the chopped onions or tomatoes first before adding the shrimp. This is good for breakfast or if you're like me, any time of day. :)

Scrambled Eggs with Shrimp
1/2 pound cleaned shrimp
1 tsp sherry
1/2 tsp cornstarch
1/4 tsp salt
1/8 tsp freshly ground black pepper
1 tbsp oil
6 eggs,beaten

Combine the sherry, cornstarch, salt and pepper in a bowl and mix well.
Add the shrimp to the marinade mixture and let sit for about 10 min.
Heat the oil in a skillet over medium heat.
Sauté shrimp for 2-3 min. until pink.
Add the eggs and stir frequently with a silicone spatula.
Cook until eggs are set but not too dry.


SUBSCRIBE BY EMAIL HERE

Read full post >>

Music Instruction For My Kids

0 comments

I started piano lessons when I was in grade school and it lasted until I was in high school. I was already playing Chopin when I stoppped my piano lessons. Looking back, I wished I continued. Hindsight is 20/20 isn't it? I'm pretty rusty with my piano playing now but I still know how to read notes and play. I'm sure with some practice I'll be back to my old game. :)

I want my kids to be able to play at least one instrument so I'm looking at music instructors. Most of them though are far from our area which is a problem. With the costs of gasoline nowadays, it will not be cheap driving to and from their music lessons. There is one music school though that will come to your house for lessons. It is called Amadeus Home Music School. They are a national organization with teachers in every state. They give private lessons in your home at the time which is most convenient for you. They use time-tested teaching methods while using new and modern instructions at the same time.

Read full post >>

Dark Chocolate Fudge Brownie Cookies

06 April 2008 10 comments

Dark Chocolate Fudge Brownie Cookies
If you are a brownie and chocolate chip cookie lover, then these cookies are made just for you. :) It is no secret that my kids and dh all have a sweet tooth. After dinner, dessert is always next. Of course, brownies and chocolate chip cookies are just some of their favorites. I found this recipe on the side of the brownie mix box a year ago and decided to try it. They all loved it so instead of making the regular brownies, I make the brownie chocolate chip cookie instead. You can see from the photo that this cookie is fudgy and moist.

I used a dark cookie sheet so I baked it at a lower temperature. It is very important to have a good cookie sheet so your cookie will not spread out too thin. The recipe tells you to grease your cookie sheet. If you are using the non-stick kind, you can omit this step or if you are using a silicone pad like Silpat. If you have the aluminum cookie sheet, I would suggest you use baking paper.

I also added white and chocolate chips. You can also add M&Ms or other chocolate bars that you fancy. Click 'Read More' for the recipe.


Dark Chocolate Fudge Brownie Cookies

1 pkg Duncan Hines Dark Chocolate Fudge Brownie Mix
1 large egg
2 tbsp water
1/3 cup vegetable oil


Preheat oven to 375degF.
Grease cookie sheet.
Combine brownie mix, egg, water and oil in large bowl.
Stir until well blended and soft dough forms.
Drop by level measuring tablespoons about 2 inches apart onto cookie sheet.
Bake at 375degF for 7 to 8 minutes or until cookies are set in center. Do not overbake.

Cool 1 minute before removing to cookie rack.

*You can also make sandwich cookies with these.
Cool cookies completely before assembling.
Use 1 can of ready-made vanilla frosting or any frosting of your choice.
Spread frosting on half the cookies.
Top each frosted cookie with another cookie.
Gently press together.

Subscribe to receive more recipes by email. You will only get emails when there is a new recipe posted. No SPAM or adverts. SUBSCRIBE BY EMAIL HERE

Read full post >>

The Perfect Engagement Ring

1 comments

Who doesn't want a diamond ring? Didn't they say that diamonds are a woman's best friend? :) My cousin has just gotten engaged last Easter. They are now on a hunt for the perfect engagement ring. Choosing one shouldn't be taken lightly, she will be wearing that engagement ring for a long time. She asked for my help in choosing her engagement ring since she knows that I like diamonds. :)

I told her about this site online of a professional jeweler James Allen. This website has all varieties of diamonds, diamond rings, engagement rings, wedding and anniversary rings. Each diamond and every ring have been photographed so she can view it online. She can also design her engagement ring online by
choosing the diamond cut she likes and then the setting. What's neat about this website is that they offer 3D viewing and not only that, she can view what the ring will look like on a person's finger with their 'Hand 3D View'. There is also a movie clip for each ring. They have a very user-friendly website, everything is laid out in a way that makes it easy for the customer to use.

The JamesAllen website is secure and encrypted so there are no worries that your information will be compromised. They offer 30-day return if she is not satisfied with her purchase. There is also a toll-free number that she can call if she has any questions. Shipping is free for all purchases. Having a website like this definitely will help my cousin choose the perfect engagement ring that she will be happy with.

Read full post >>

Prime Rib, A Meatlover's Delight

05 April 2008 3 comments

Prime Rib You would think that the best Prime Rib I've ever tasted was in some fancy restaurant in San Francisco or Boston. It wasn't. Dh and I were visiting friends in Kingman, Arizona and we went to this restaurant on top of the mountain. It is not a fancy schmanzy restaurant with waiters dressed in black-tie. It is just your run-of-the-mill mom and pop run place. But wait till you try their Prime Rib, it just melted in your mouth. THE BEST!

After that experience, I've always been in the hunt for the perfect recipe. I'm an avid-watcher of Alton Brown's show 'Good Eats' on the Food Network. He did a show on Prime Rib. If you've watched Alton, you know that he uses a variety of techniques. Some of his techniques and/or tools will make you scratch your head and wonder if that will really work. This is one of those shows, he used a terra-cotta pot to cover the meat. If I had a clean one with no plants in it, I would've probably tried it too. But then, I don't have a clean one so I just used a regular roast pan with a cover.

I cooked this standing rib roast for Easter Dinner. I bought a four-bone roast which is more than enough for our family. I adjusted the cooking time since we want our meat medium. The ends of the prime rib came out medium-well which is just right for the kids.

Dry-Aged Standing Rib Roast


1 (4-bone-in) standing rib roast, preferably from the loin end
Canola oil, to coat roast
Kosher salt
Freshly ground pepper, to cover entire roast

1 cup water
1 cup red wine
4 fresh sage leaves

Preparation Three Days Before Cooking:
Remove any plastic wrapping or butcher's paper from the roast. Place the standing rib roast upright onto a half sheet pan fitted with a rack. The rack is essential for drainage. Place dry towels loosely on top of the roast. This will help to draw moisture away from the meat. Place into a refrigerator at approximately 50 to 60 percent humidity and between 34 and 38 degrees F. You can measure both with a refrigerator thermometer. Change the towels daily for 3 days.

Turn the oven to 250 degrees F.


Remove the roast from the refrigerator and rub with canola oil. Remember to rub the bones with oil, as well. Once the roast is completely coated with oil cover the roast with salt,about half a teaspoon per bone.


Next, rub with freshly ground pepper to coat the surface.

Place the roast over a glass bake-ware dish slightly smaller than the length of the roast. This will catch the drippings needed for the sauce.

Finally, place a probe thermometer into the center of the roast and set for 118 degrees. Put the roast and the bake-ware dish into the oven. Turn the oven down to 200 degrees F and roast until internal temperature is achieved.


Remove the roast and turn oven up to 500 degrees F.

Remove the lid and re-cover with heavy-duty foil. Allow the roast to rest until an internal temperature of 130 degrees F. is reached.

Place the roast back into the preheated 500 degree F oven for about 10 minutes or until you've achieved your desired crust.

Remove and transfer roast to a cutting board. Keep covered with foil until ready to serve.

Degrease the juices in the glass pan. Place the pan over low heat and deglaze with 1 cup of water.

Add the wine and reduce by half.

Roll the sage leaves in between your fingers to release the flavors and aroma. Add to the sauce and cook for 1 minute.

Strain and serve on the side.


SUBSCRIBE BY EMAIL HERE

Read full post >>

Inflatable Pool For The Family

0 comments

Every summer, we always go to my in-laws house to go swimming. Even though we live near some beautiful beaches (less than ten minute drive) we still prefer the pool because it is a lot safer than the open water. Amber has been getting swimming lessons ever since she started attending summer camp. She enjoys it a lot and lately, she has been asking for us to have a pool in the backyard.

That would be nice, but with the way our house was built, we cannot have an inground pool in our backyard. So the next best thing would be an above-ground pool. I've been searching online and found Intex Pools. They have a large selection of inflatable pools and accessories. I found one that is the perfect size for our backyard. It is fairly easy to set up and maintain. I'm sure the kids are going to be excited to have a pool that they can use anytime.

Read full post >>

A 70-Year Old First Grader

0 comments

I saw on the news about this gentleman who is seventy-years old and is in First grade. His name is Alfred Williams from Kansas City, Oklahoma. He never got the chance to go to school because he worked on the fields to help his family.
He said that he promised his mother that he will go to school and get an education. That time has come and he is now in first grade and is learning to read.

This is one of those stories that leaves you feeling good. It goes to show that you are never too old to study. No matter what your circumstances are, if you have a yearn to learn, it is never too late to start.

Read full post >>

My Brother Erik

0 comments

My only brother Erik who is one year younger than I am is still living in the Philippines. Every one in my family except him are all here in the US. He got married early and because of US Immigration Laws, it takes longer for him to immigrate here in the US. A couple of months ago though, we heard the long-awaited news that the US Embassy in Manila sent him a letter. If all goes well, we are expecting him to arrive in the US at the end of the year or early next year.

Through email, he asked for advice on going back to school to be able to get a better job. He wasn't happy with the course he took in college and graduated with. I told him that he can go to school and become an Xray Technician. I know a friend who became an X-ray Technician and she is earning a good income.

X ray Technicians earn about $32,000 and up. They work in a nice and comfortable environment. The hours are good too. I hope that when he comes here in the US, he will consider this and be able to build a good life for himself.

Read full post >>

Chocolate Kahlua Cake Anyone?

04 April 2008 8 comments

Chocolate Kahlua Cake We went to my in-laws last weekend for a late Easter Egg Hunt. They just arrived from wintering in Florida last Holy Week, hence the late Easter celebration. I always bring Lumpia Shanghai every time dh's family get together. I serve it as an appetizer and they all like our Lumpia (even the teenagers).

This time though, I didn't have time to make it. So on a fly, I decided to try a new recipe I found online. It is very easy, uses a cake mix, instant chocolate pudding, sour cream, chocolate chips and Kahlua creme. I didn't tell dh that there's Kahlua in the cake but he noticed. You can't really tell unless you've tasted Kahlua creme. I saw one recipe that called for one cup of Kahlua, wow, that will be very strong. In this recipe though, it only calls for one-third cup so the Kahlua flavor doesn't overpower the chocolate.

This is the moistest chocolate cake I've made, very chocolatey and of course, delicious. :) The addition of the sour cream makes it moist. You should try it and you'll know what I mean.

CHOCOLATE KAHLUA CAKE

1 pkg. chocolate cake mix
1 (3 3/4 oz.) pkg. vanilla or chocolate instant pudding mix
2 c. sour cream (16 oz)
4 eggs
3/4 c. oil
1/3 c. Kahlua
6 oz. pkg. chocolate chips

Combine cake mix, pudding mix, sour cream, eggs, oil, and Kahlua. Mix until well blended. Stir in chocolate chips. Pour into a well-greased and floured Bundt pan. Bake at 350 degrees for 1 hour.


Enjoy!

SUBSCRIBE BY EMAIL HERE

Read full post >>

Am I Turning Green? I Don't Think So...

02 April 2008 0 comments

I got this tag from my very good friend Mira over at Mira's Web Journal(http://mira_burns.bravejournal.com).
As you can see from my results, I am not a jealous person. Be it in my personal relationship or in my friendship with others, I do not get jealous, very rarely, if ever.


You Are 6% Jealous

You aren't jealous in the least, and it's a very good thing.
You are content with your own life, and you're proud of who you are.
And you are able to be truly happy when a friend has things go their way.
You're confident, capable, and full of high self esteem. Keep it up!

How Jealous Are You?
http://www.blogthings.com/howjealousareyouquiz/


I'm passing this on to Janet, Kerslyn, Amor and Michelle. :)

Read full post >>